Cockpit: manage ALL your servers
Whether your are a newbie or a seasoned system administrator you will surely have dealt with SSH and administering multiple machines. You know that you can do that for a few machines, but when the number goes up, it soon becomes a nightmare without help. Meet Cockpit, the administrator-approved web-based tool to manage all your servers.
What is Cockpit?
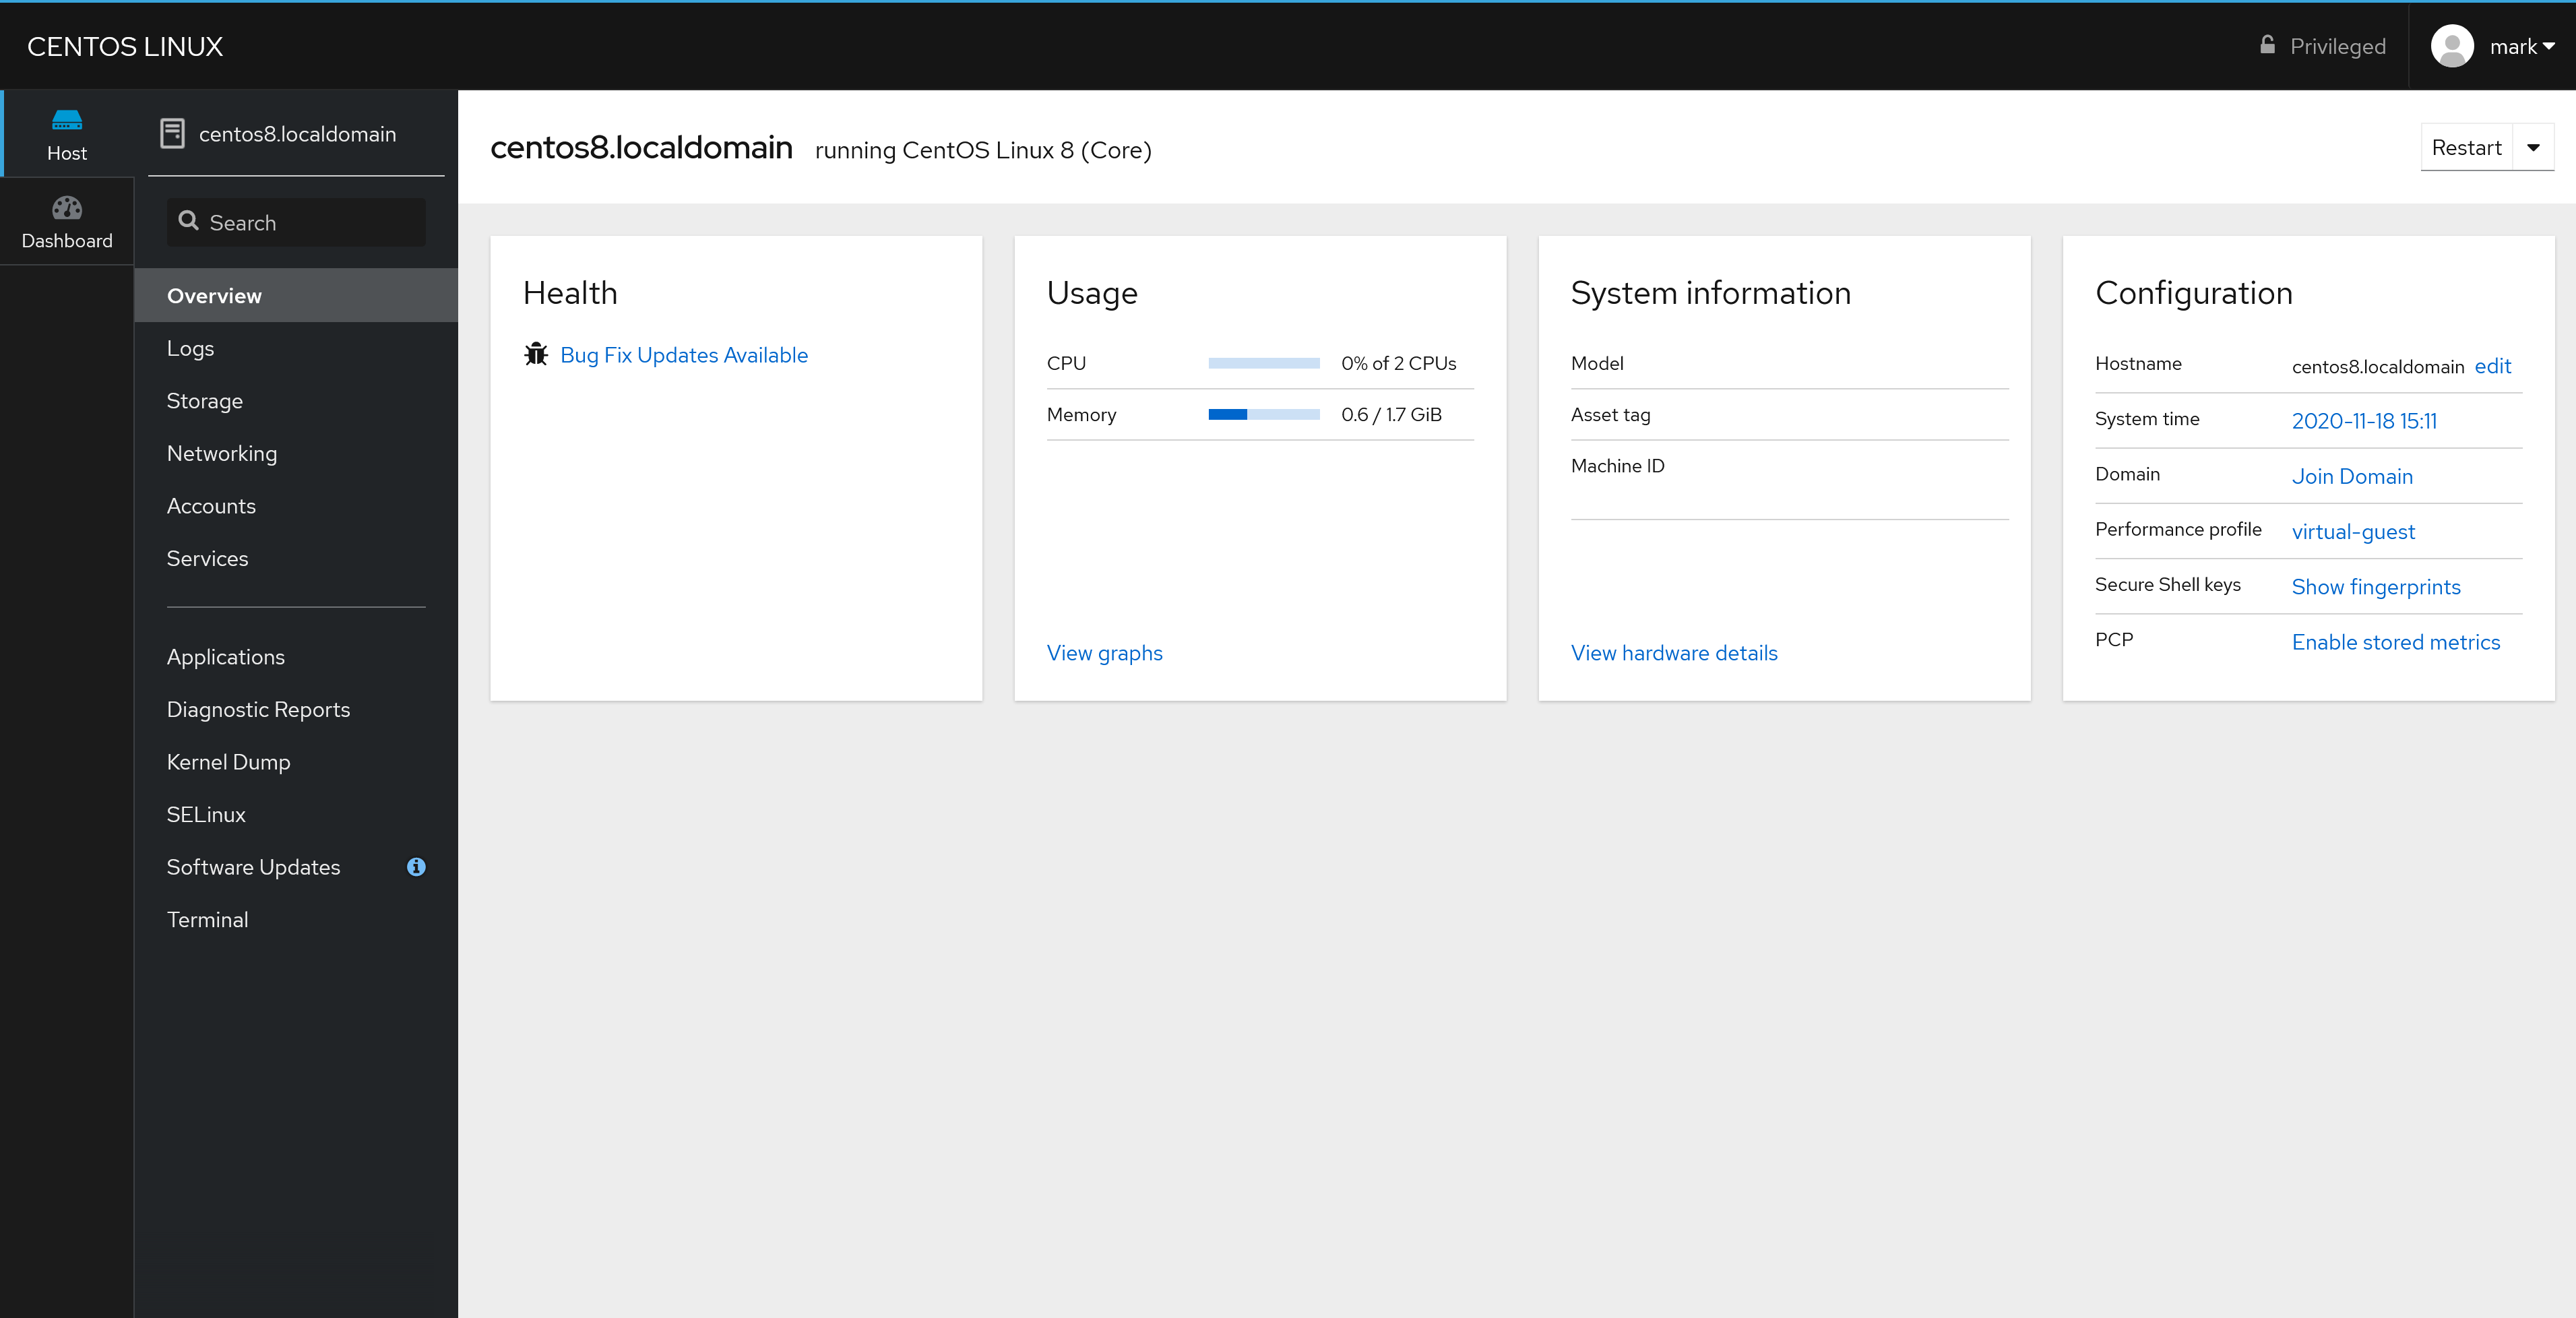
Cockpit is a tool that allows an administrator to perform routine administration tasks through a web interface. While most administrators will still prefer SSH for many tasks, Cockpit is not your simple SSH replacement, it does much more. As a matter of fact you can open a virtual terminal right through your web browser through Cockpit.
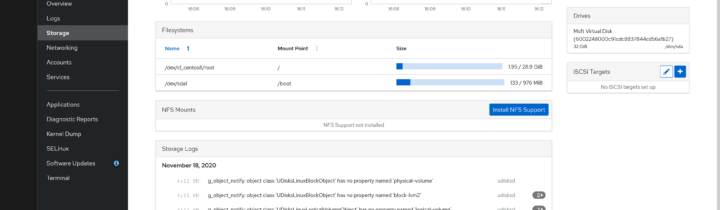
From monitoring networking to log visualization, Cockpit has a module for every basic administration task you can think of: monitoring, log visualization, performance charts, network configuration, storage configuration, services configuration, even containers and much more.
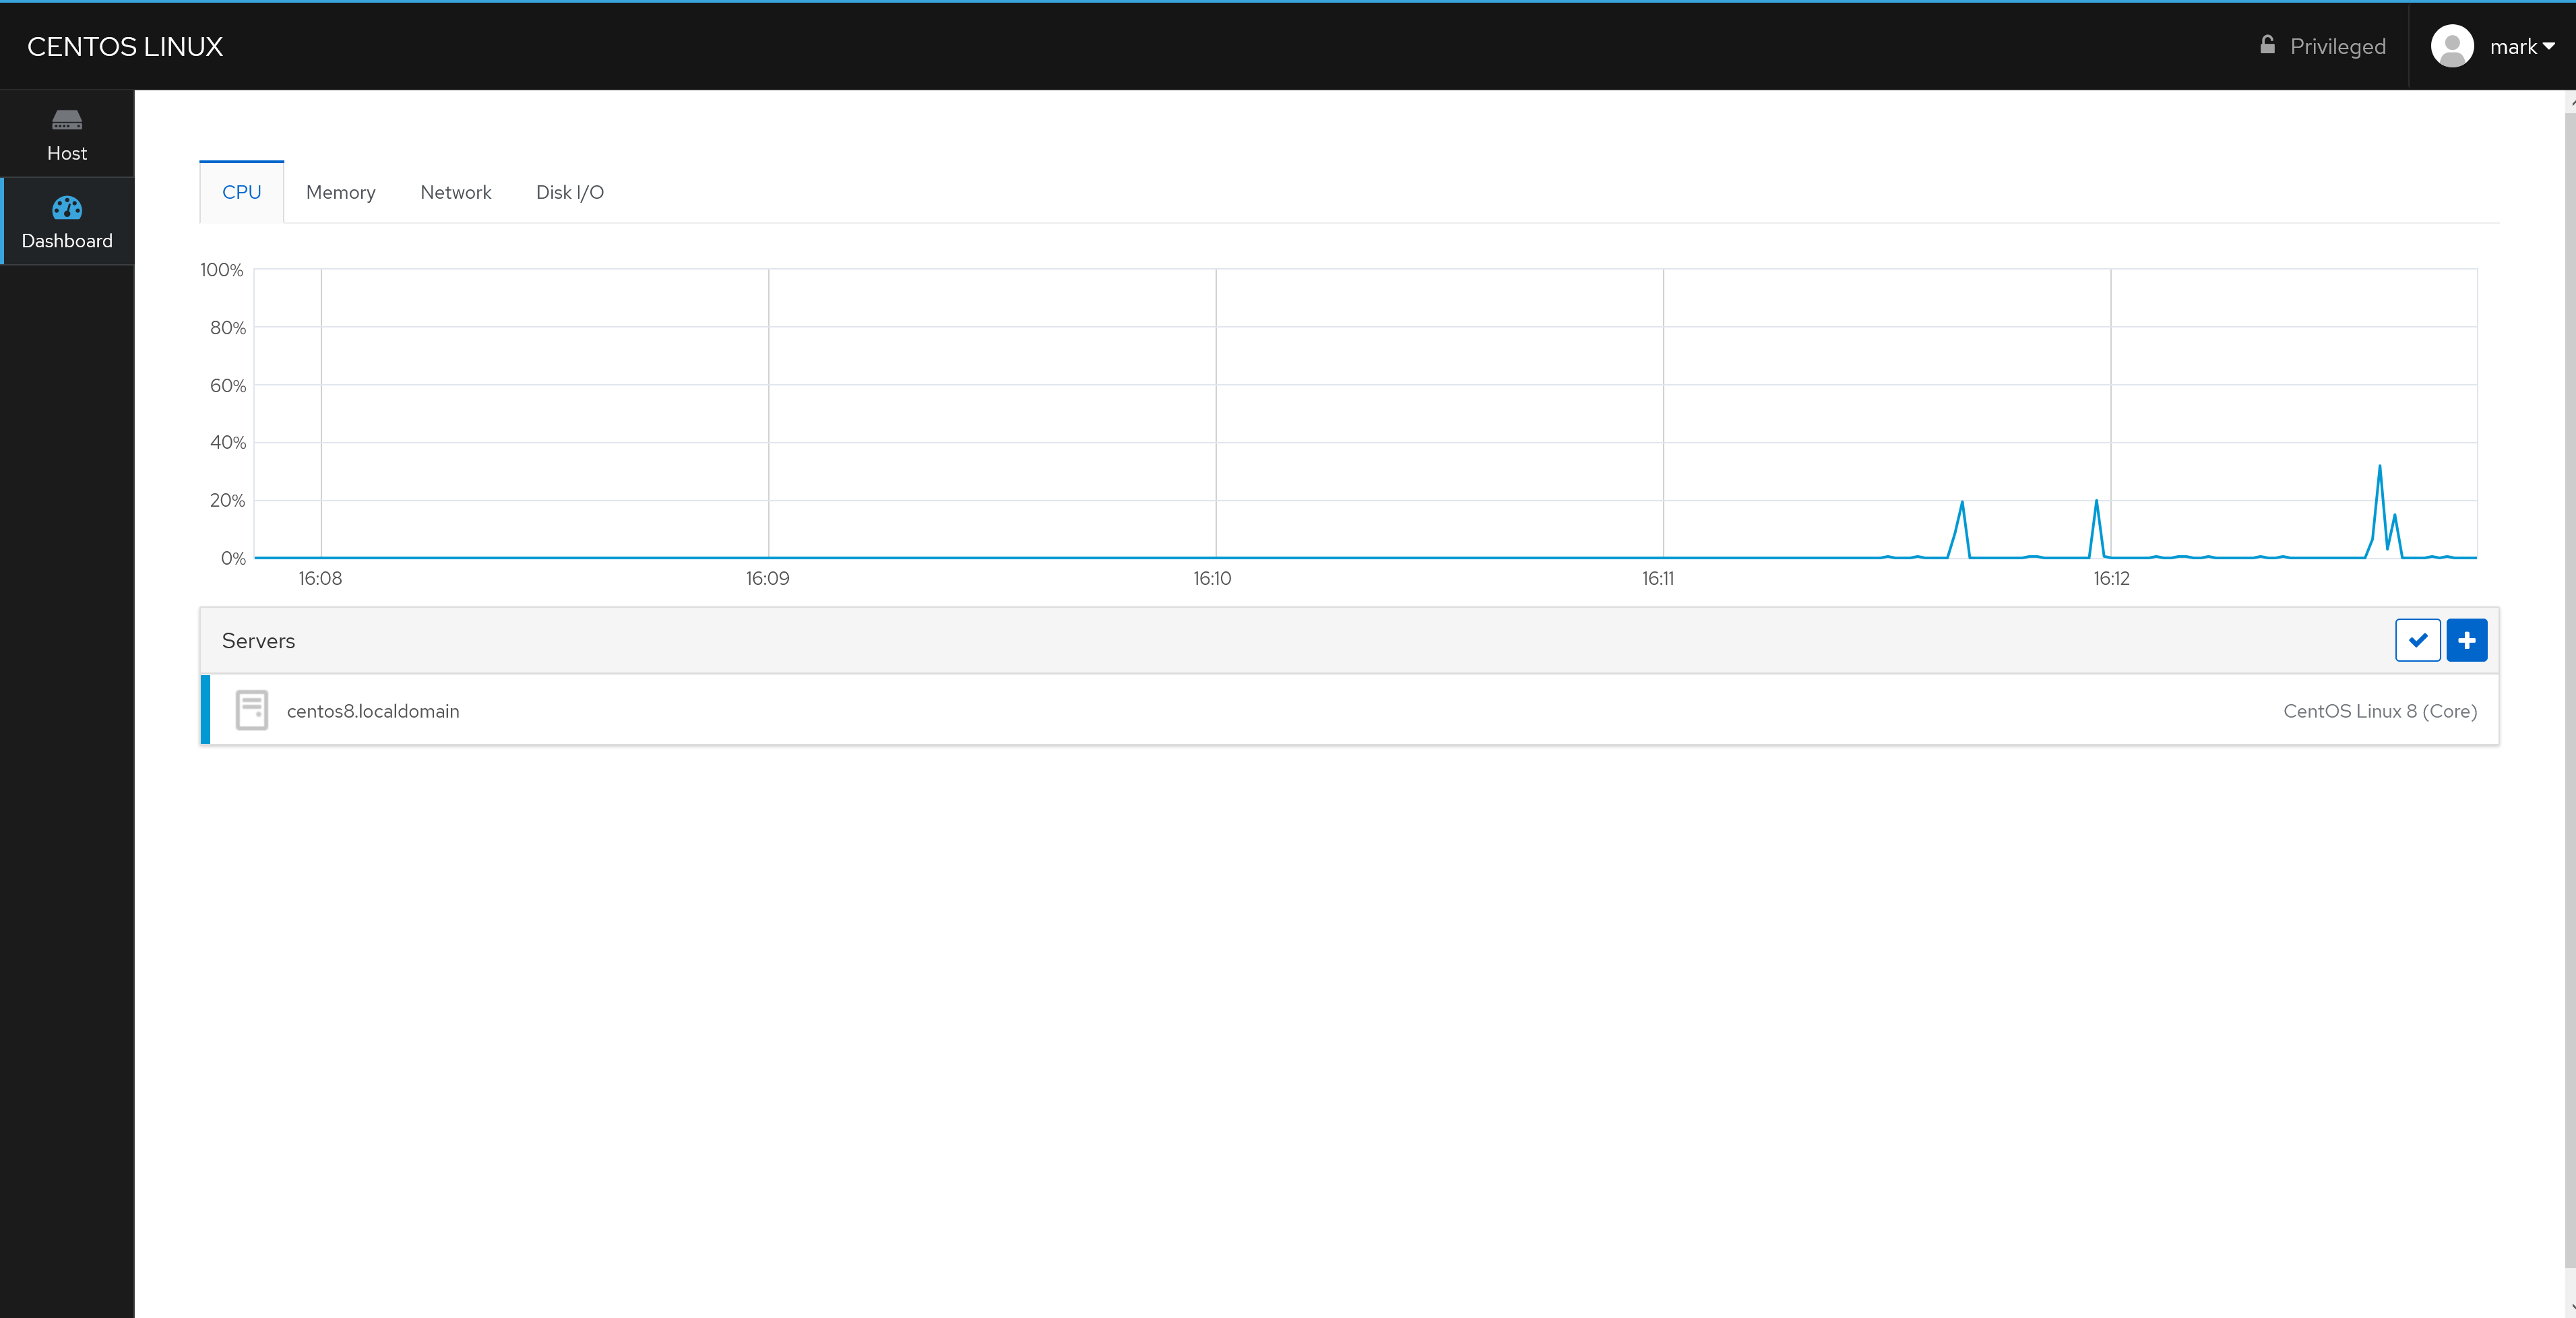
Maybe Cockpit strongest point over SSH is the capability to manage multiple Cockpit instance through one interface. In order to connect to another server you only need a valid user account and (preferably) a registered SSH key.

What about security? Isn’t it unsafe to run commands through a web connection? Cockpit implements secure standards such as SSL (self-signed by default), authentication and authorization is handled through the underlying module in the system (e.g. PAM, LDAP, Kerberos). By default Cockpit will create a self-signed certificate and will use local accounts to authenticate the user, the service will be available through port 9090.
Cockpit supports the latest versions of Mozilla Firefox, Google Chrome and Microsoft Edge.
How to get started
If you’re using a major Linux distribution chances are that Cockpit is already packaged. If you’re using a different distribution you can refer to your distribution manual.
From now on Cockpit will be available through your-ip-address:9090 or your-fqdn:9090. In some versions the Dashboard and Storage modules are not installed by default, in order to install them you can search for cockpit-dashboard and cockpit-storaged.
- 2020 A year in review for Marksei.com - 30 December 2020
- Red Hat pulls the kill switch on CentOS - 16 December 2020
- OpenZFS 2.0 released: unified ZFS for Linux and BSD - 9 December 2020


Recent Comments