How to install Mageia 6 in 10 easy steps

Mageia 6 is the spiritual successor to Mandirva, an old Linux distribution aimed to Desktop machines that was discontinued after the homonym company shut down. Today you can learn how to install Mageia 6 in 10 easy steps.
What’s new?
In case you missed it, you can discover Mageia 6 new exciting features here.
How to install Mageia 6
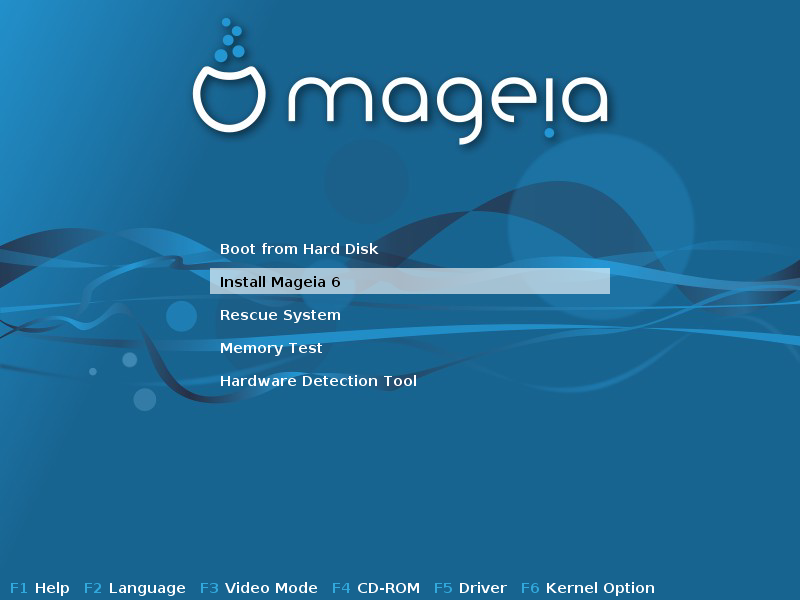
1) Boot from a support
The first thing you need to do in order to install Mageia 6 is to create a bootable support from which to install. Go to the Mageia website, download an image and burn it on a support, if you don't know how to, you can follow this tutorial. Mageia comes with three different image types:
- Classic Installation: this image only allows to install Mageia and will have many packages bundled, this is useful if you need to perform the installation without Internet access.
- Live Media: these images allow you to test the distribution before installing, they come with different flavours depending on the desktop environment.
- Network Installation: this image is much like the Classic Installation one, but it doesn't pack many packages and needs Internet connection to perform the installation.
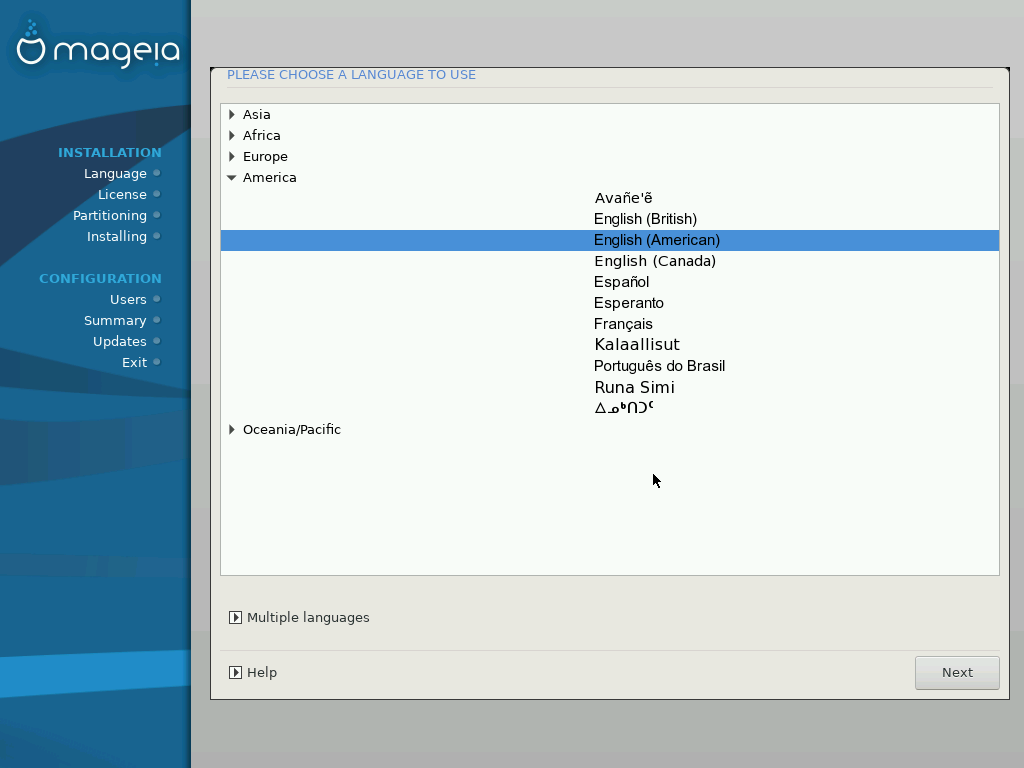
2.1) Language
In this step you just need to select the language that will be used for the installation and for the operating system. There's also an option to install multiple languages.
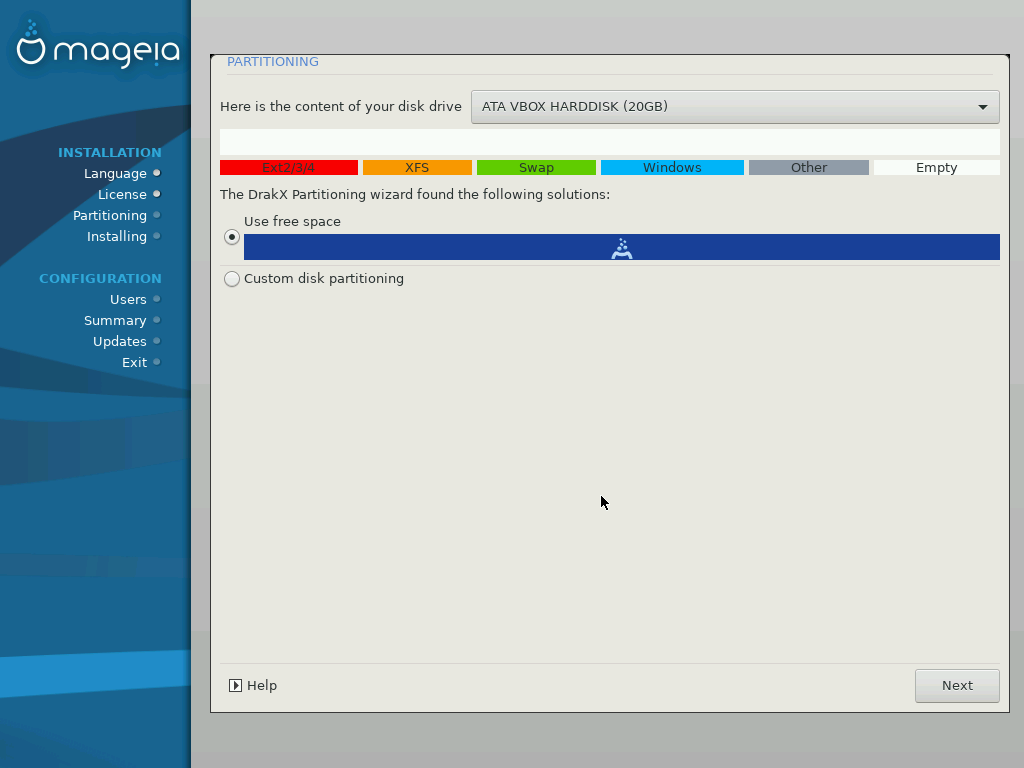
3.1) Disk layout - Empty drive
The next thing to do is to select a disk to install Mageia on. Beware this step can potentially cause data loss, do it at your own risk. There are two possible scenario in this case:
- You have an empty drive.
- You have one or more Operating Systems installed.
The image above shows an empty disk. In this case you can simply select "Use free space" and let Mageia handle it. If you have a disk with one or more OS installed go to the next step.
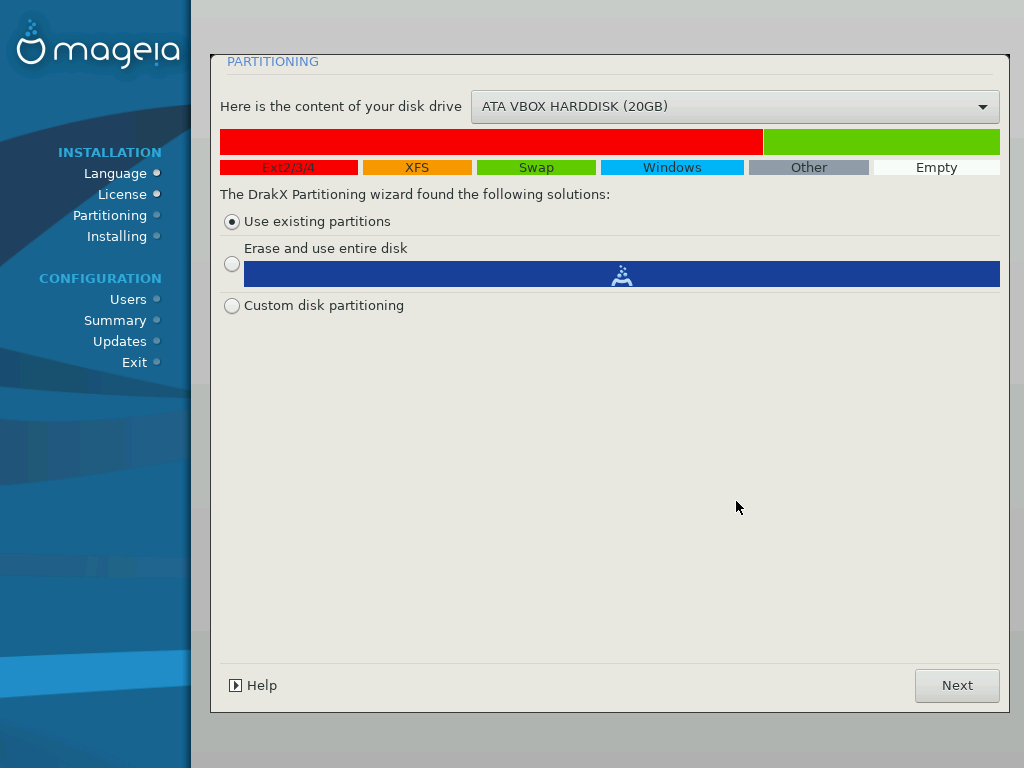
3.1) Disk layout - Empty drive
In this case you will have one or more OS already installed on the device you want to use to install Mageia. You can choose to use existing partitions, erase and use the entire disk or perform custom disk partitioning.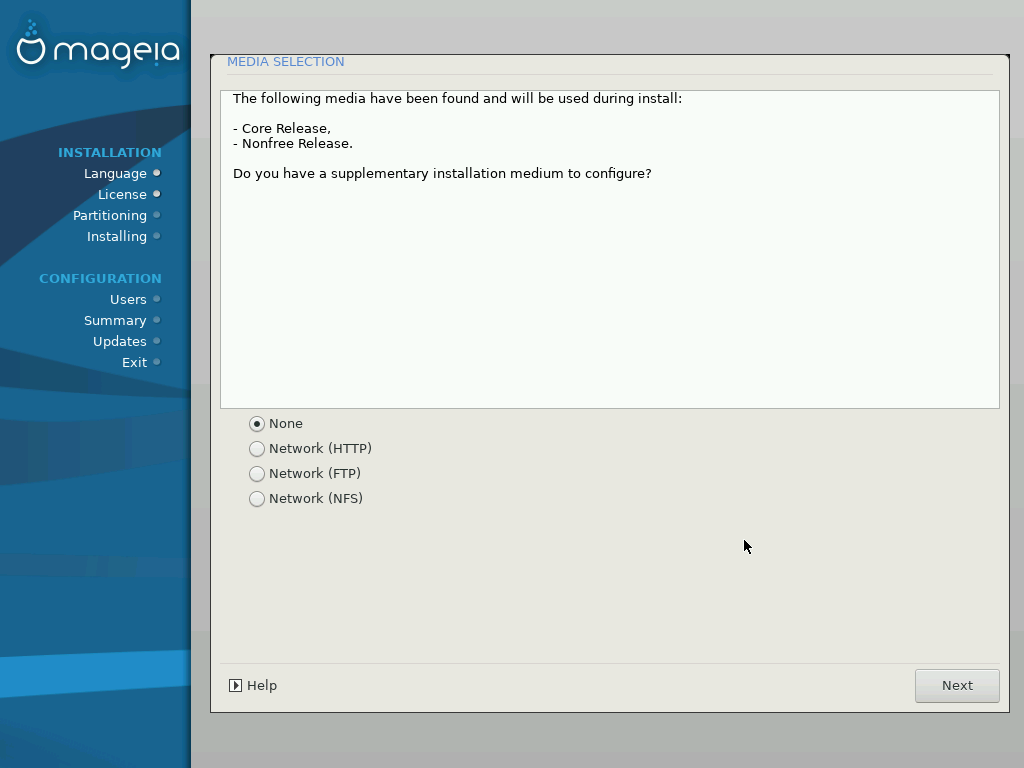
4.1) Media selection
In this screen you can select more sources from which to obtain packages to install (repositories). If you're a beginner or not interested (the local disk should suffice), you can just press Next.
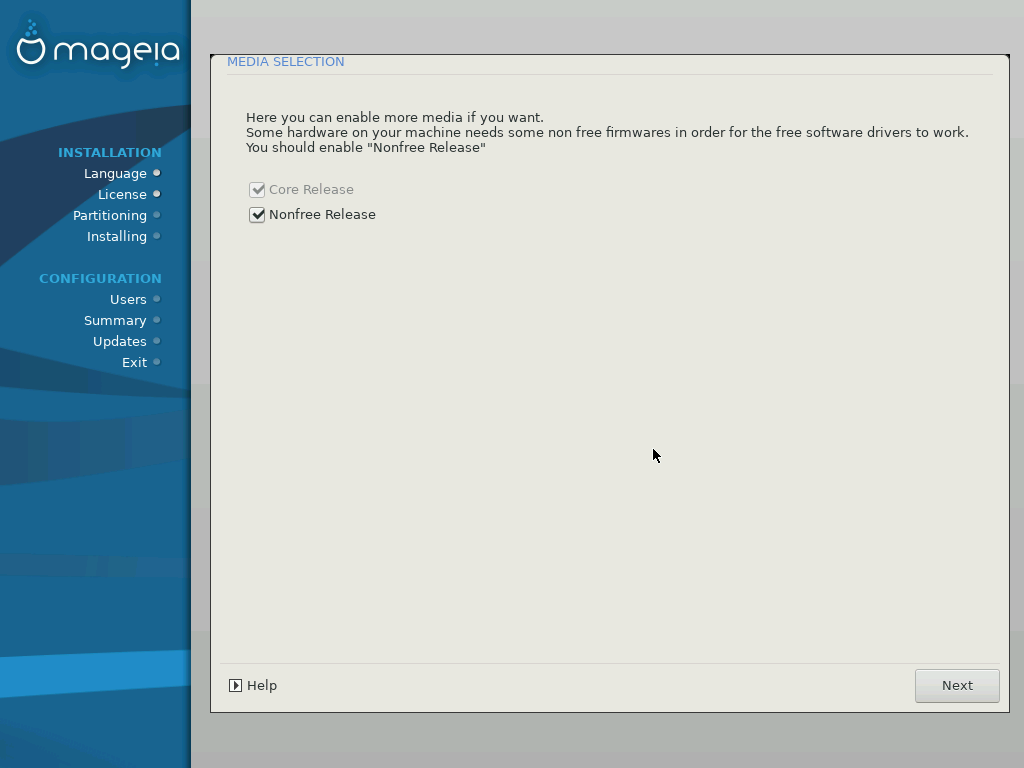
4.2) Media selection
In this step you will review the choice you made in the precedent step, and you can decide to enable/disable the sources. Once done, you can proceed.

5.1) Desktop Environment selection
In this step you can chose the desktop environment you want to use. If you're a beginner I suggest you to select KDE or GNOME. You can also decide to use something else, in that case select custom and go to the next slide.
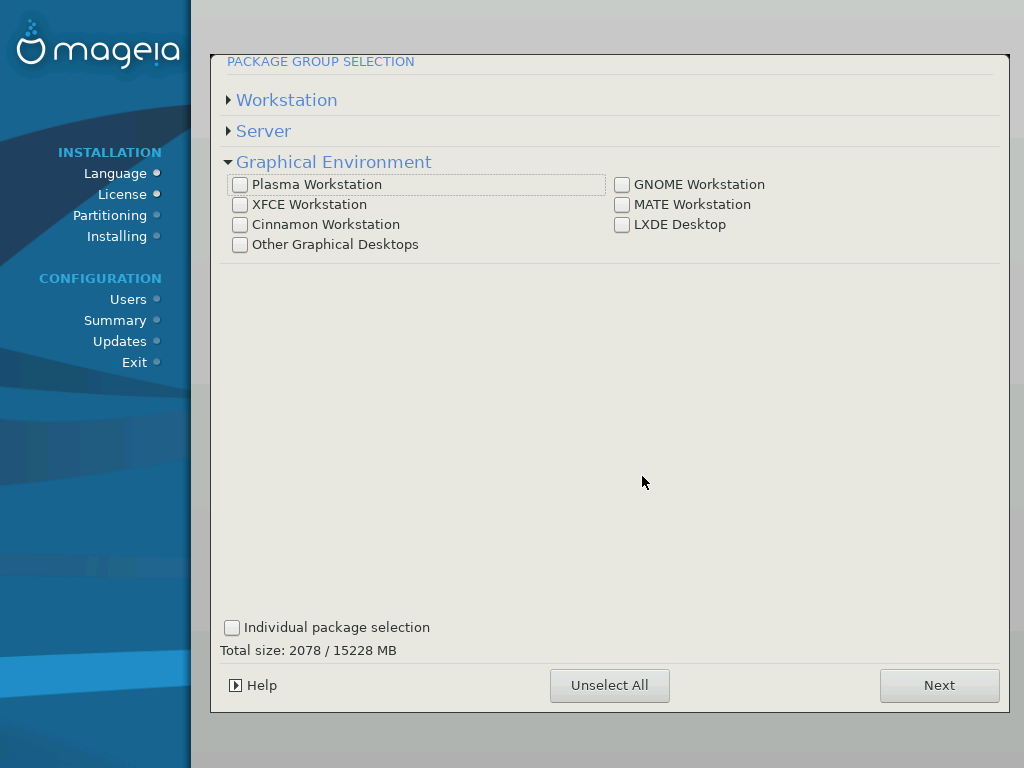
5.2) A different Desktop Environment
In the case you want a different desktop environment, you can select it here. Also, in this screen you can choose which packages will be installed along with the operating system.
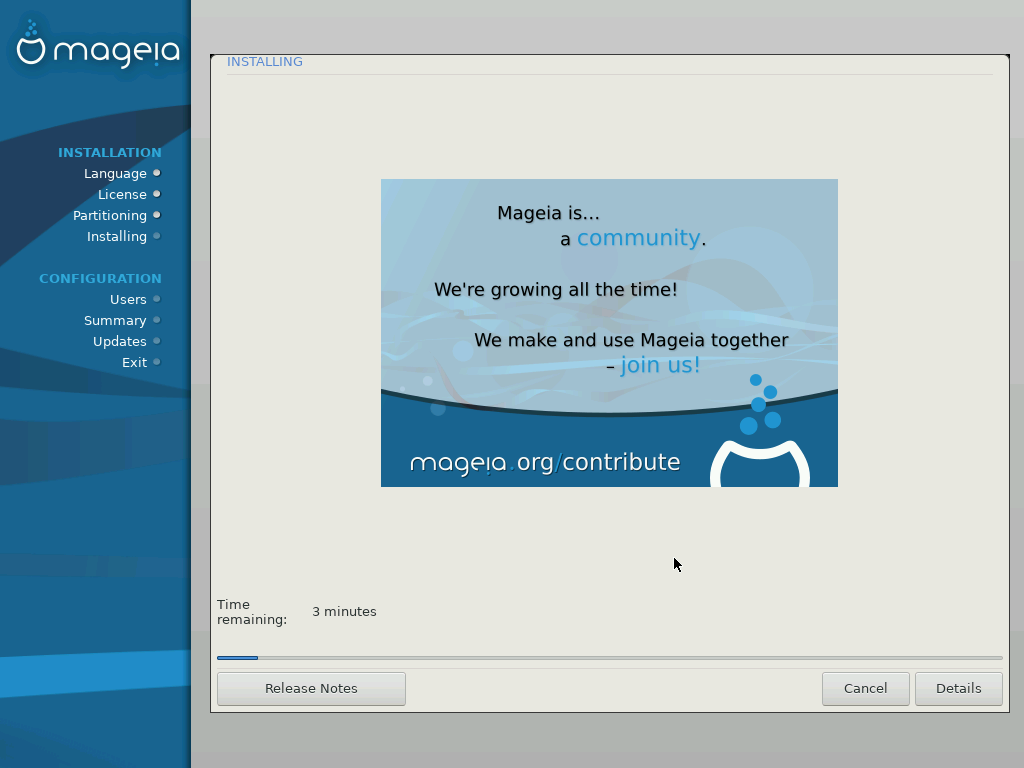
6) Installing!
In this step Mageia will finalize your installation, it can potentially take a long time. Also, the installation is not yet complete and will require further input.
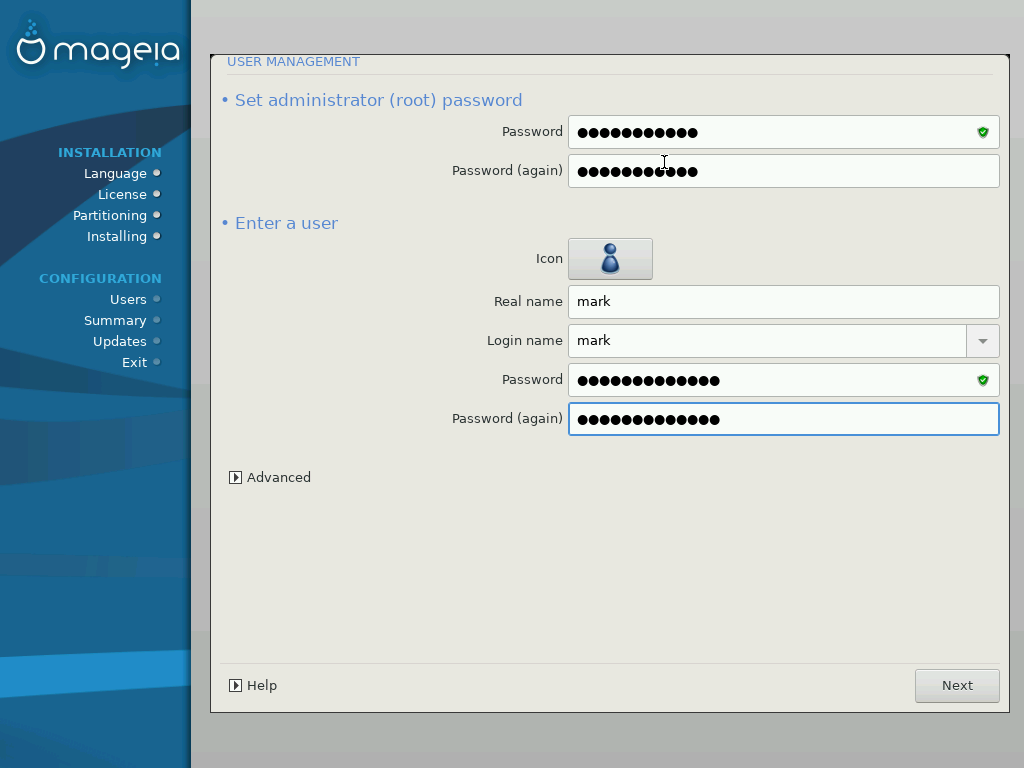
7) User configuration
In this step you need to configure both your account and a root account. Be careful to remember both password! If you lose either one it can be difficult to recover them if you're not an advanced user!
From the Advanced option you can choose UID and GID of the newly created user.
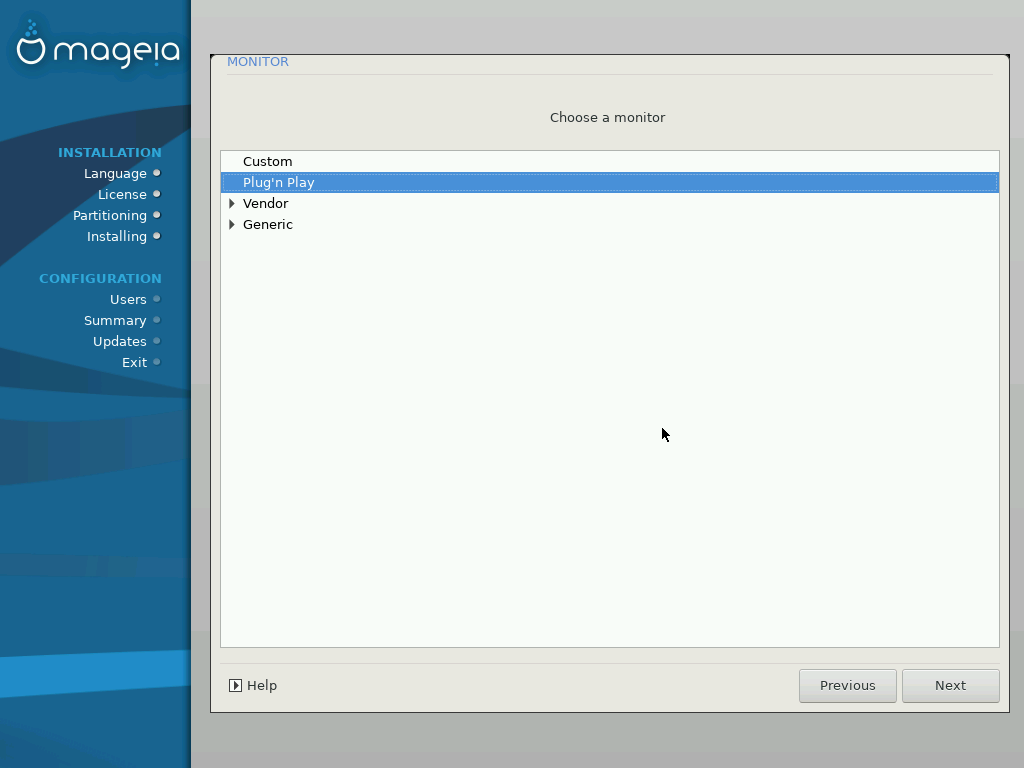
8) Monitor
Strangely enough you need to specify which monitor you're using. I suggest you to pick the one you have from the list, if that's not possible select Plug'n Play.

9) Summary
This is a summary of what you've done up until now. If you're willing to change something you did can do so in this step.


Conclusion
Mageia 6, once installed, looks like and behaves like a modern Linux distribution. Its integration with KDE is good and you can really see the effort since Mageia 5. However, it still lacks in the installer section. The installer looks outdated and it isn’t really user-friendly, the installer partitioning system doesn’t allow a beginner to ignore what’s happening and can cause confusion. Overall I do think that’s a huge weak point for a desktop distribution, and maybe Mageia would benefit from implementing another installer like Calamares.
- 2020 A year in review for Marksei.com - 30 December 2020
- Red Hat pulls the kill switch on CentOS - 16 December 2020
- OpenZFS 2.0 released: unified ZFS for Linux and BSD - 9 December 2020


Recent Comments