How to install Microsoft SQL Server on Linux

During the past few years, Microsoft has been investing resources in Linux-related projects. Today you can install Microsoft SQL Server on Linux. All of it began with .NET being open-sourced. Then it was the turn of PowerShell. Microsoft even released a subsystem to run Ubuntu on Windows 10. We could discuss for hours whether these actions are pure open-source spirit or just a big commercial plan. Nevertheless, under Satya Nadella’s leadership Microsoft is changing, and even its attitude toward Linux is changing.
Microsoft SQL Server on Linux
With the umpteenth shocking announcement, Microsoft made SQL Server available for Linux. Now, remember it is still a preview and only runs on Ubuntu and RHEL at the moment. The only requirement exposed by Microsoft is memory: at least 3.25GB no more than 256GB (untested). The current supported versions (and the ones used in this guide) are:
- Ubuntu 16.04 Xenial Xerus
- RHEL 7.2 Maipo (CentOS 7.2 is okay too)
Installing Microsoft SQL Server on Linux
- The first step is to add the repositories, it can be done by performing the following commands. I modified them from the original Microsoft documentation so that you can read the actual contents of each repository.
- The second step is to actually install the software:
- The third step involves the execution of a script that will prompt you to accept the license and set an administrator (SA) password for SQL Server. You will also be asked whether to start and/or enable the service at boot-time.
- The last step involves adding the rule to the firewall:
Managing Microsoft SQL Server
The newly installed DBMS is now available on the machine and it is controlled by systemD:
Test the connection
Now you should have a functioning installation of Microsoft SQL Server, it is time to access to it. You have two options:
- Use the command line from Linux.
- Use SSMS (SQL Server Management Studio) from a Windows machine.
Linux command line:
$ sqlcmd -S localhost -U SA
Password:
1> CREATE DATABASE Test
2> GO
1> EXIT
SQL Server Management Studio

SSMS Connection
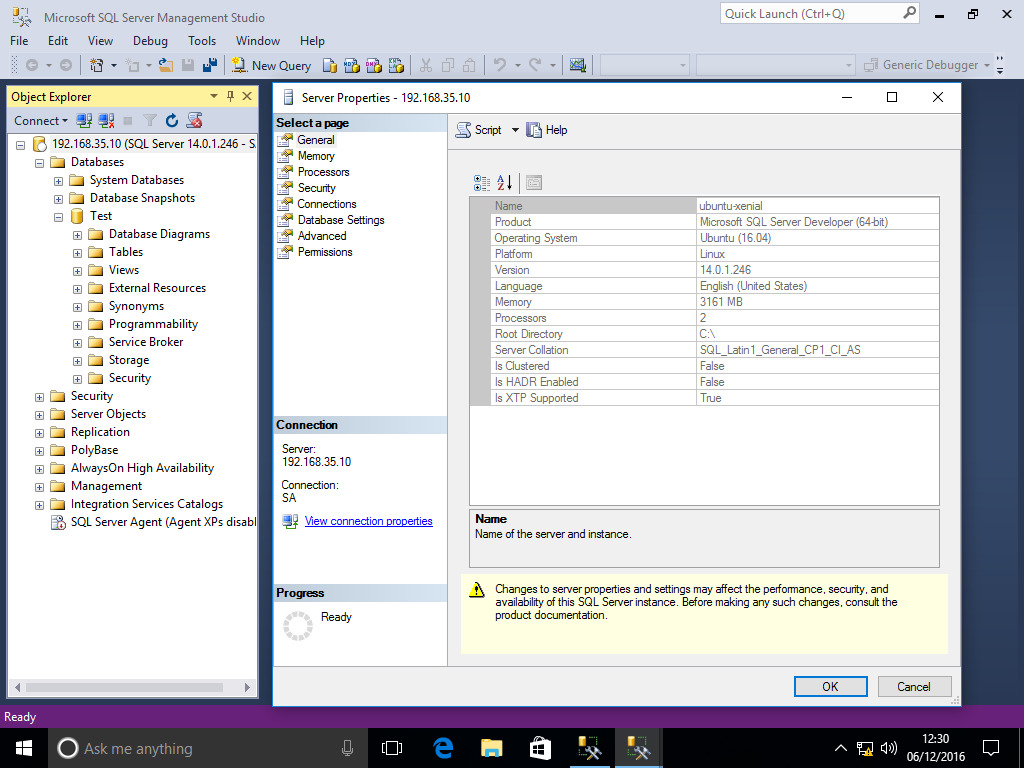
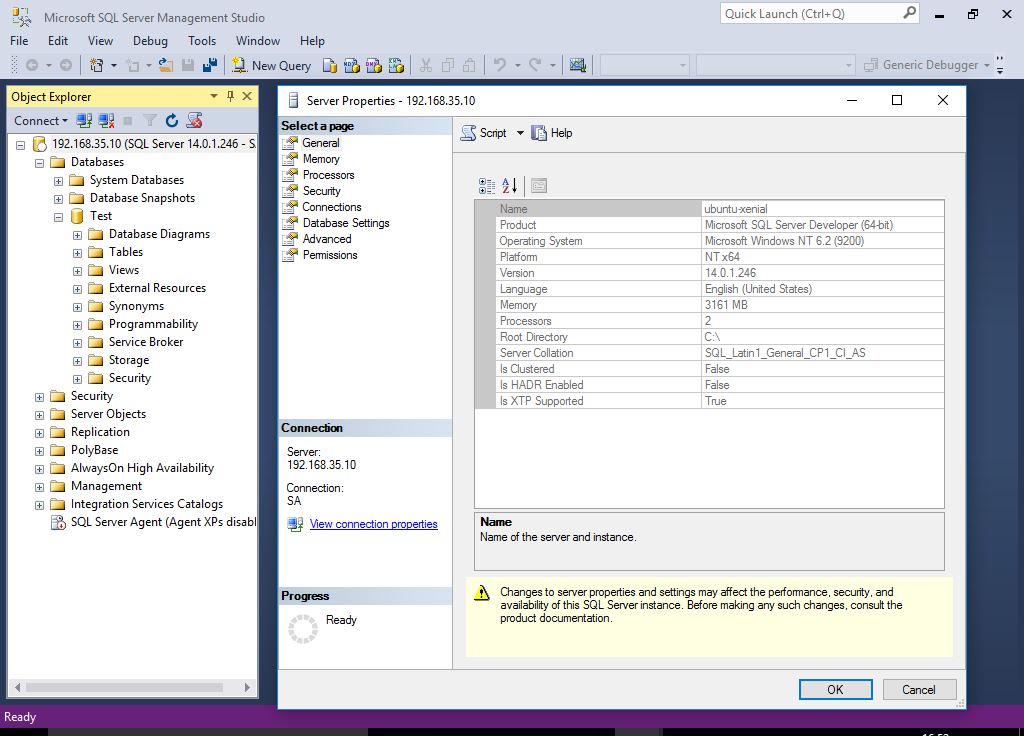
To connect to the server using SQL Server Management Studio, just type the address of the server and select SQL Server Authentication. After that enter username and password (you can use SA and the password you set up using sqlserv-setup).
Here you can see two screenshots of SSMS (version 16.5 and 17.0 RC1) connecting to Ubuntu and CentOS machines. During the first boot Ubuntu was showing correctly, while CentOS was not. Now both are displayed as Windows NT. I initially tested both using SSMS 16.5, but version 17.0 is required for the correct operating system to show up. (Thanks to David Shiflet and Travis Wright.)


Conclusion
You now know how to install and perform basic operations with Microsoft SQL Server for Linux. Please keep in mind that this is still a preview and it might not work as you expect (e.g. CentOS shows Windows NT).
- 2020 A year in review for Marksei.com - 30 December 2020
- Red Hat pulls the kill switch on CentOS - 16 December 2020
- OpenZFS 2.0 released: unified ZFS for Linux and BSD - 9 December 2020


which version of SSMS are you using where you see that server information with Windows NT?
I was using SSMS 16.5
the 17.0 RC 1 release should give you better results with Linux SQL instances. Please try it out and let us know how it goes.
thx
Thank you for your insight, I updated the article.
Thank you for your insight, I updated the original article.