How to install Fedora 25 in 10 easy steps

Fedora 25 is the second release of the year 2016 of the developers’ favourite operating system. Packing cutting-edge features and pushing forward the whole Linux ecosystem here comes Fedora 25 and how to install it!
How to install Fedora 25
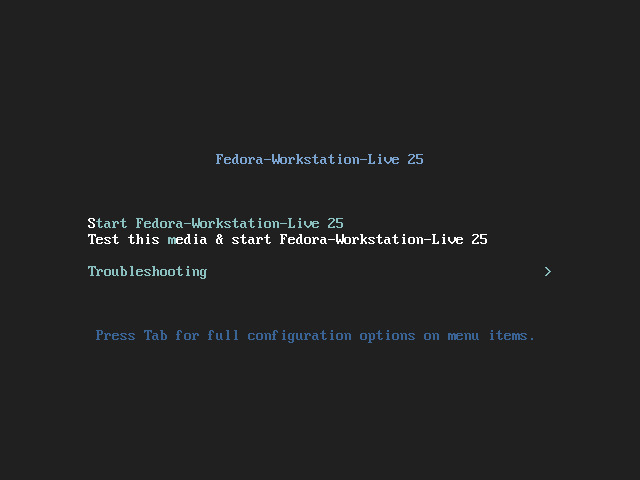
1) Boot from a support
The first thing you have to do to proceed with the installation of Fedora 25 is boot it from a support (CD/DVD and USB Pendrives are today the best options), if you don’t know how to burn the image onto the support find a tutorial on the Internet or use this tutorial. Once you have your support, reboot your machine, select an option like “boot options” or “boot priority list” and select your support, in this way you should see this screen. Select “Start Fedora-Workstation-Live 25” to start the installation. Once done, you will be facing the login screen, click on "Live System User" to get to the next step.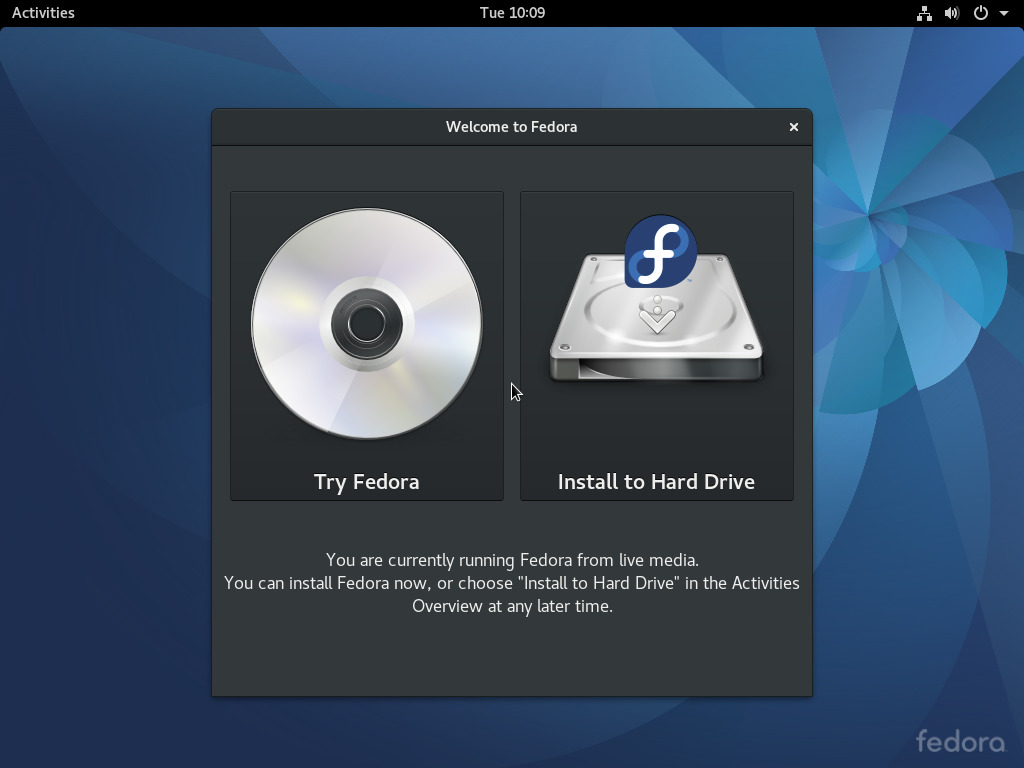
2) Fedora 25 Live
Now you’re in the live media, your computer is still untouched. From here you can choose to try Fedora 25 (try it a bit to see if everything works fine; usually audio, video, peripherals and network are the things to look at) or to install it right away. When you’re ready to install move on to the next step.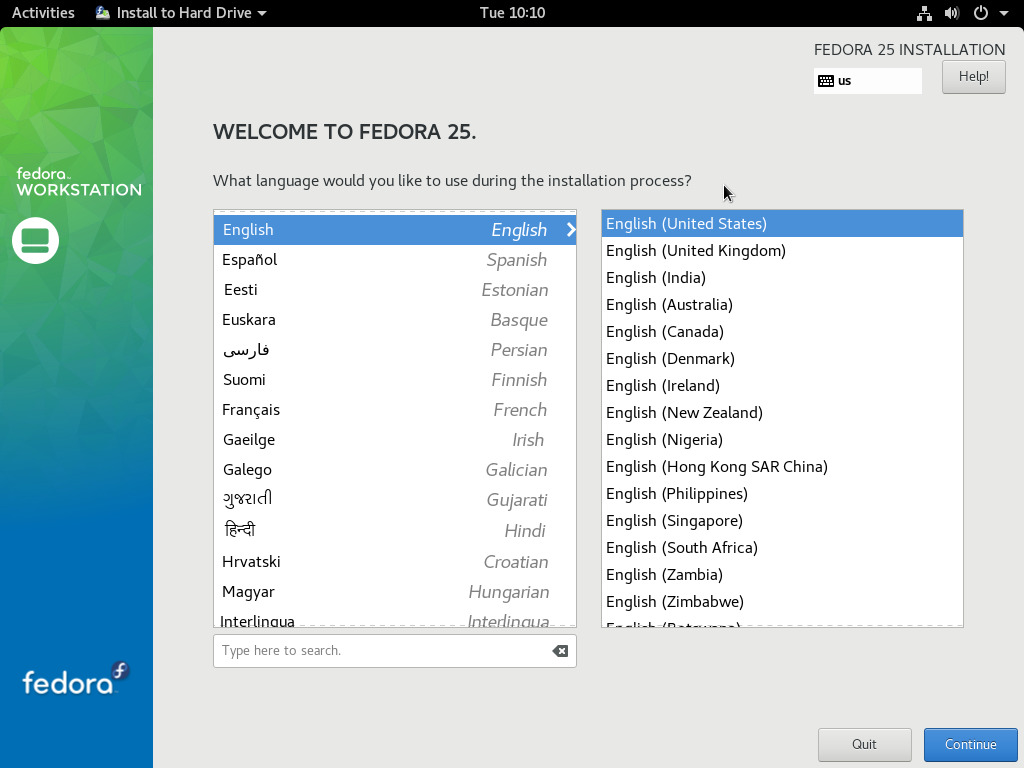
3) Welcome to Fedora 25
In this step you just need to select your preferred language and keyboard layout during the installation. Selecting your language here will affect only the installation, and you can always change system’s language after the installation.
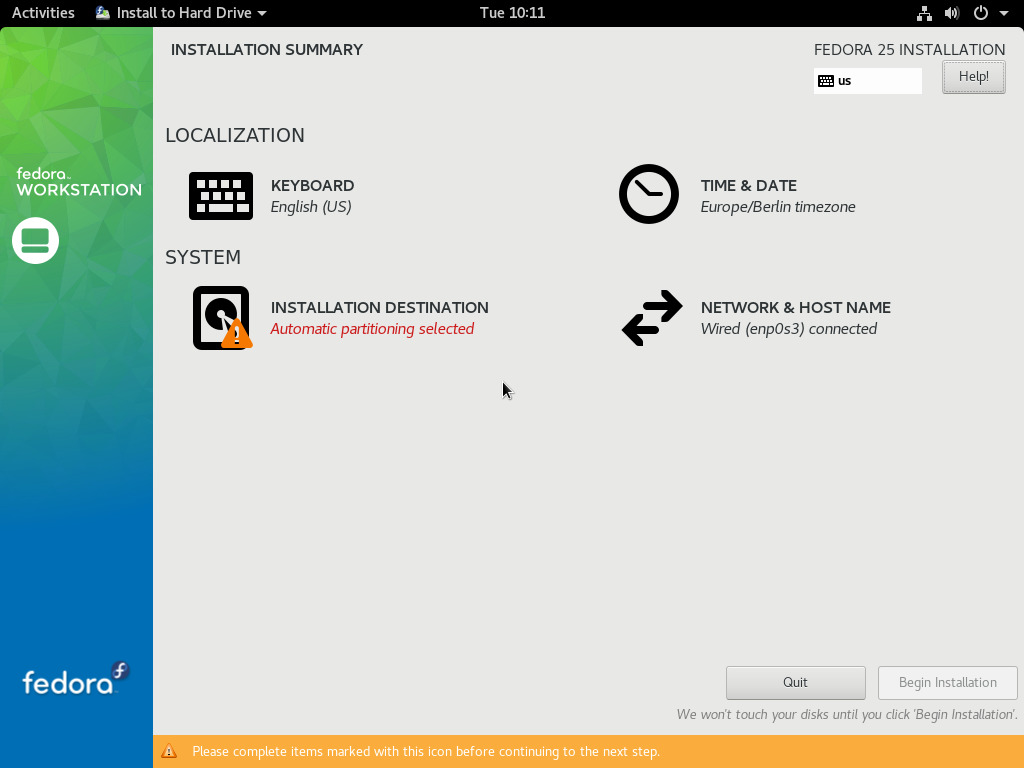
4) The hub
This is the hub of the installation that will guide you through the basic configuration. Also, until you click “Begin Installation” there won’t be changes happening on your computer. So be relaxed and don’t panic. I will review each step of the hub excluding “keyboard” which should have been set on the second step.
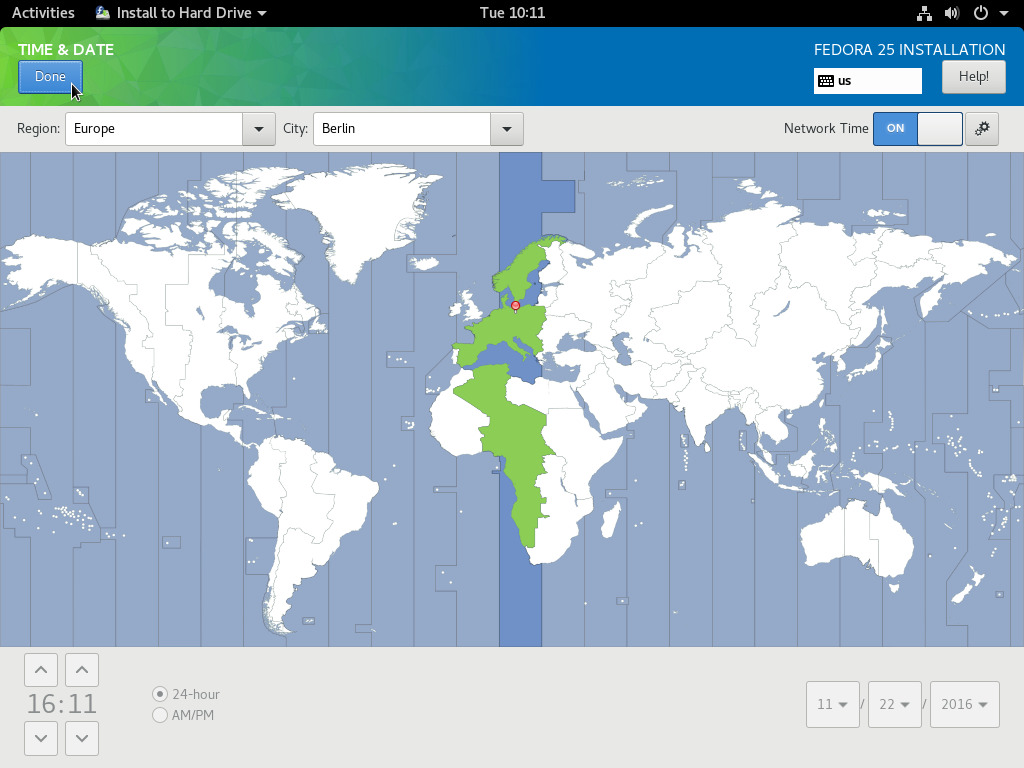
5.1) Date & Time
By clicking on Date & Time, this will be the screen you’ll be facing. Just select your time zone and set your current time. If you have selected (and I suggest you to) Network Time, time and date will be retrieved from the Internet. If you have no Internet connectivity, disable it by switching off the switch on the top-right corner.
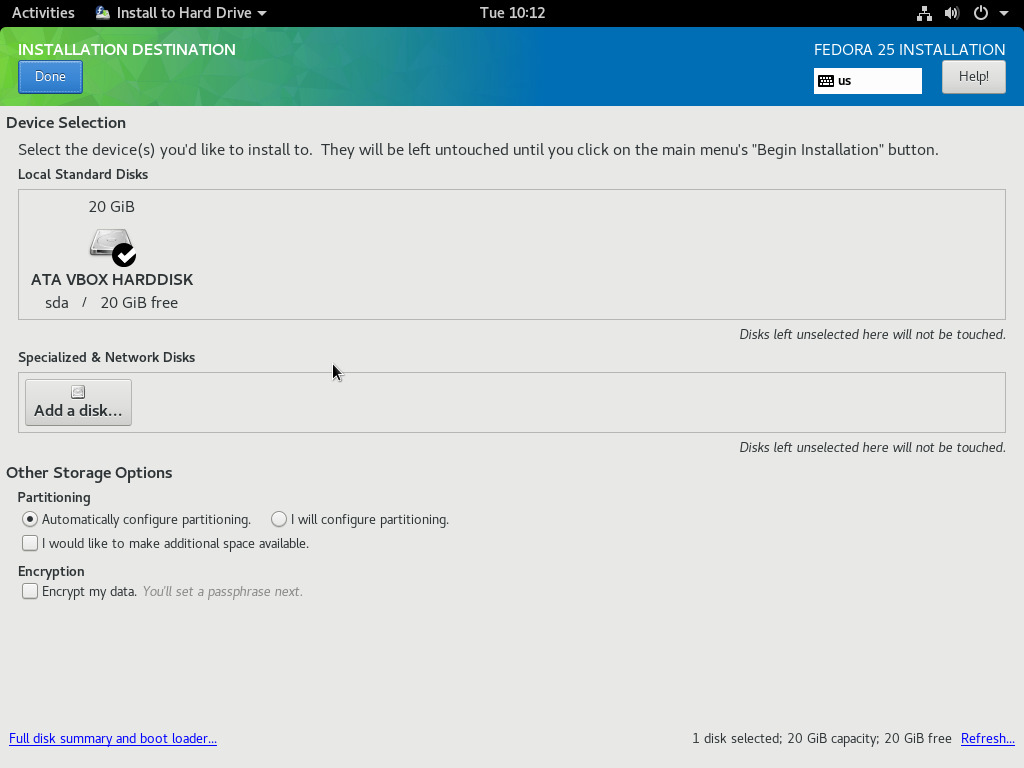
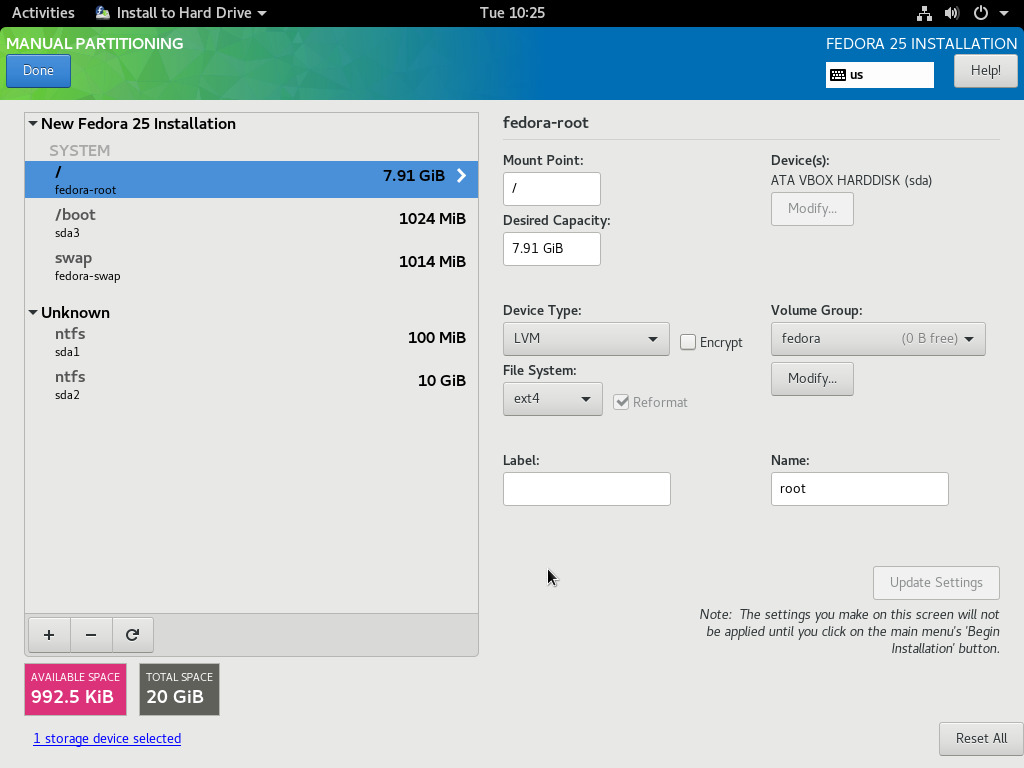
5.3.1) Selecting devices
This is the most crucial step in the whole installation, pay great attention to what you do, since messing here may mean data loss. In this step you need to select the devices where you want to install Fedora 25 on (yes you can specify multiple devices, but if you’re not experienced, just check one). Now you can face two different scenarios: an empty drive or one or more OS installed. If you have an empty drive, just be sure to select “Automatically configure partitioning” and you’re ready to go. If you haven’t an empty drive or want to do things manually follow one of the next two steps.
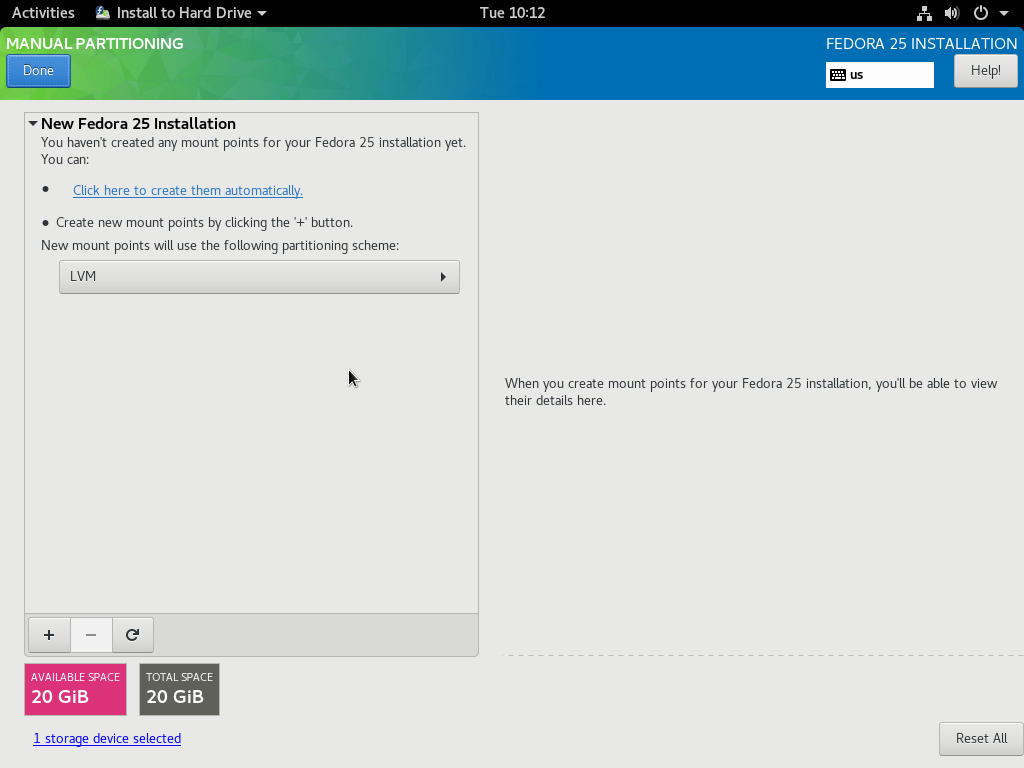
5.3.2) CASE 1 - You have an empty drive
In the case you have an empty drive the screen will be like the one above. If you have enough knowledge you can partition your disk according to your own needs. But if you haven’t I suggest you click on “Click here to create them automatically” (it will have the same effects of “Automatically configure partitioning” in the precedent step.
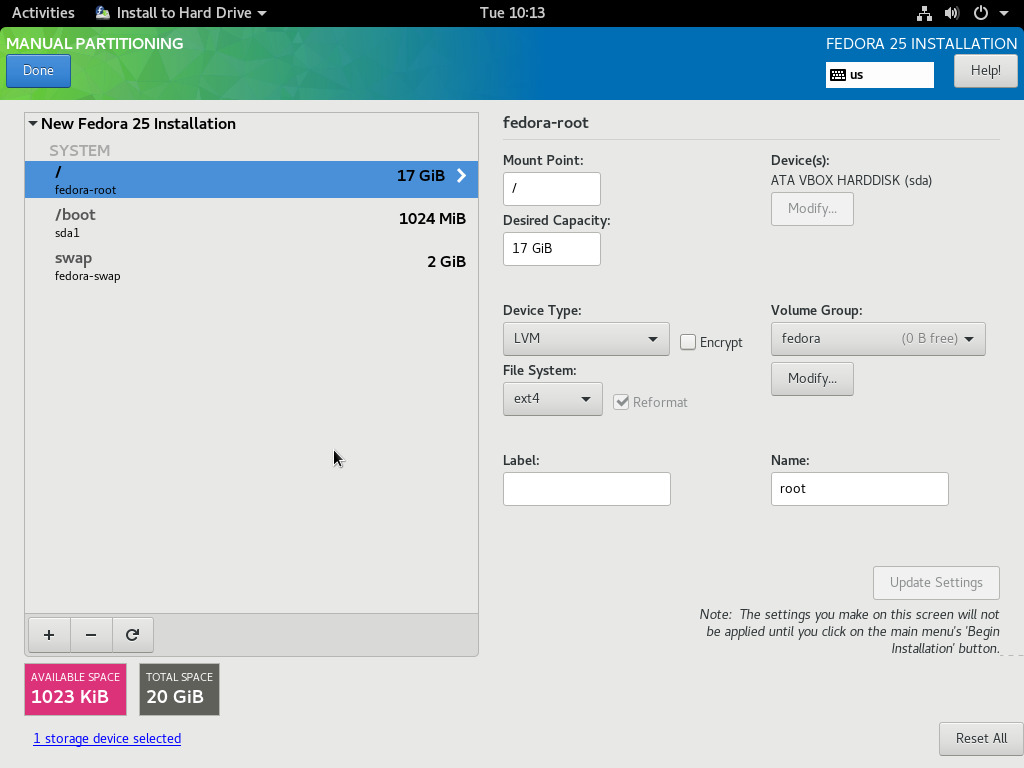
5.3.2) CASE 1 - You have an empty drive - result
In case you have an empty drive you will see a similar screen if you proceeded correctly.
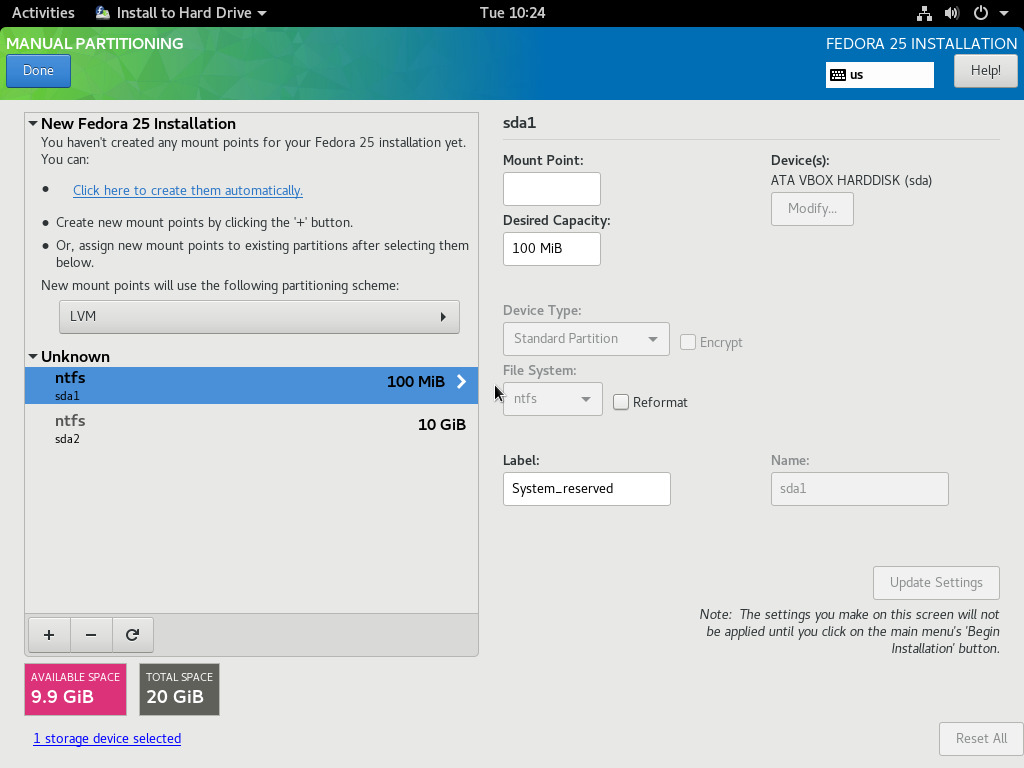
5.3.3) CASE 2 - You have one or more OS installed
In this scenario you have one or more OS installed on your disk. In my screenshot I have a Windows 7 installation, but it is not (yet) properly recognized and is shown as “Unknown”.
- If you want to delete one or more Operating Systems just highlight them and click the minus “-” on the bottom of the left box. After that just click Click here to create them automatically or create partitions manually to complete the step and click done.
- If you decided to install Fedora 25 alongside another Operating System just click on Click here to create them automatically.
5.3.3) CASE 2 - You have one or more OS installed - result
In the case you have one or more OS installed, you'll be facing a similar screen if you proceeded correctly. You can clearly see the new installation (top) and the preserved pre-existing OS (bottom) called "unknown".
6) All ready!
At this point you will have everything configured, beware, now is your last chance to recognize mistakes, and if you click “Begin Installation” the installation will proceed and start modifying your disks. So be sure to double check everything if you have doubts, or ask the help of someone experienced.
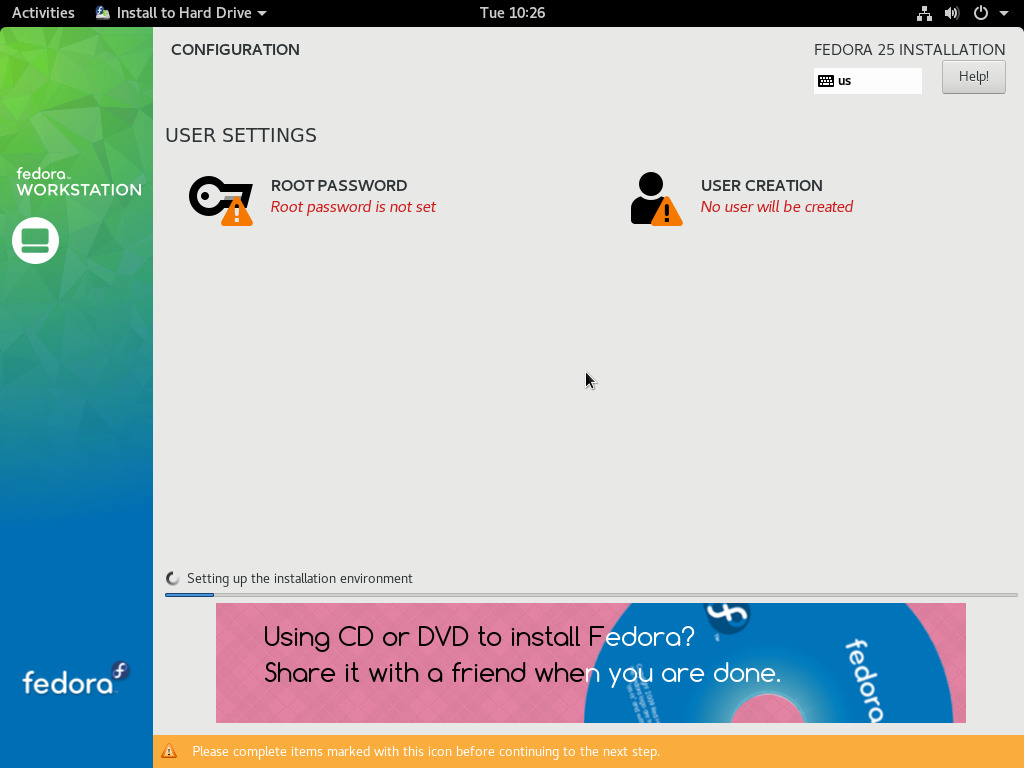
7) Installation Starts
As you can see the installation process has started, now don’t go away to take your coffee yet: you still have to configure your user and root user. One of them has to be filled and you have three choices:
- Configure only user (and make it an administrator) SUGGESTED
- Configure user and root
- Configure only root DISCOURAGED
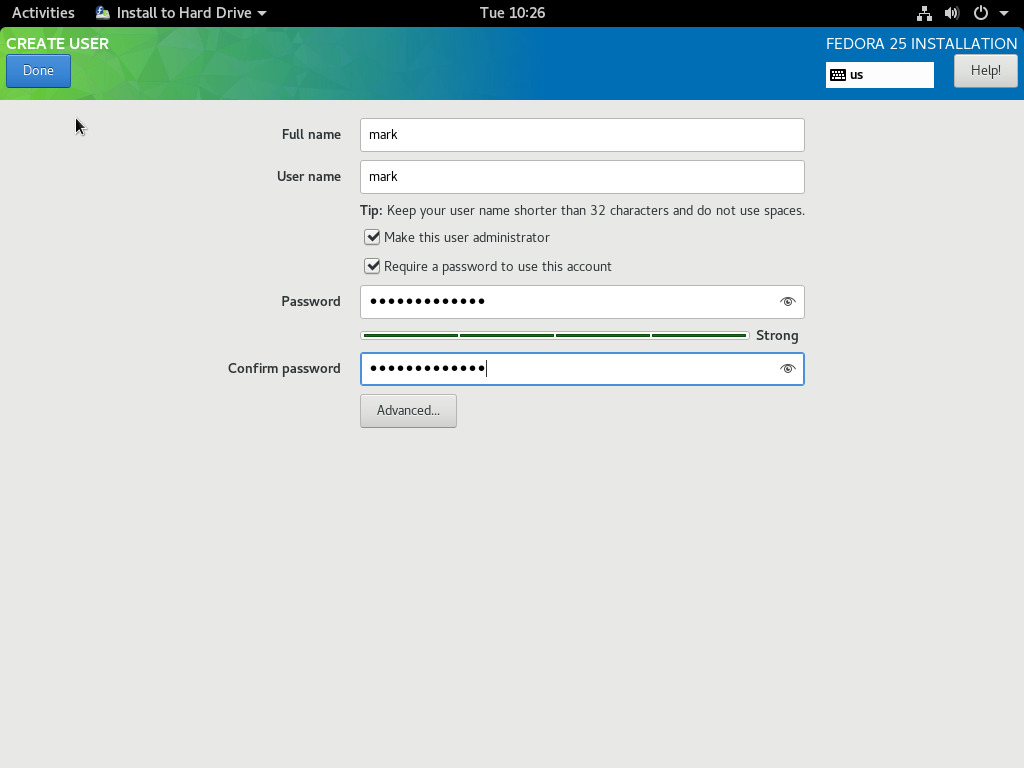
7.1) Configuring user
In this step you just configure your user, if you want to be an administrator be sure to check “Make this user administrator” (in this way you can skip the following step). I also suggest you to use a password. Beware: if you use a weak password you’ll have to click “Done” twice.
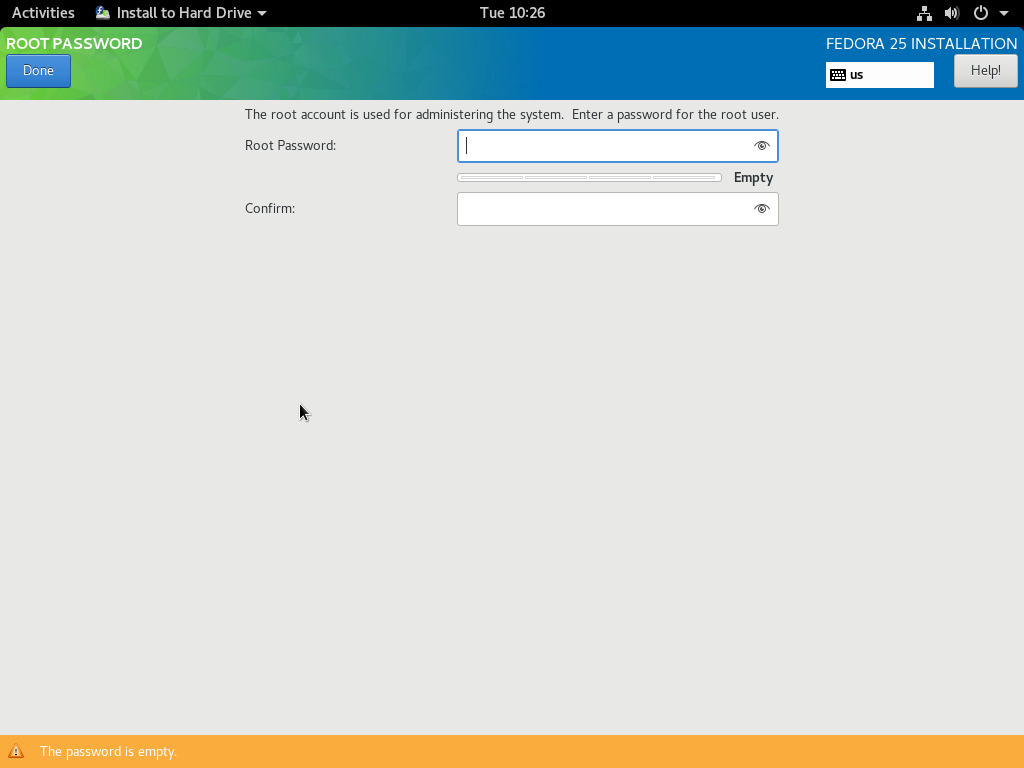
7.2) Configuring root
As you can see this step is much simpler, it just requires a password, be sure to pick something not-too-easy.
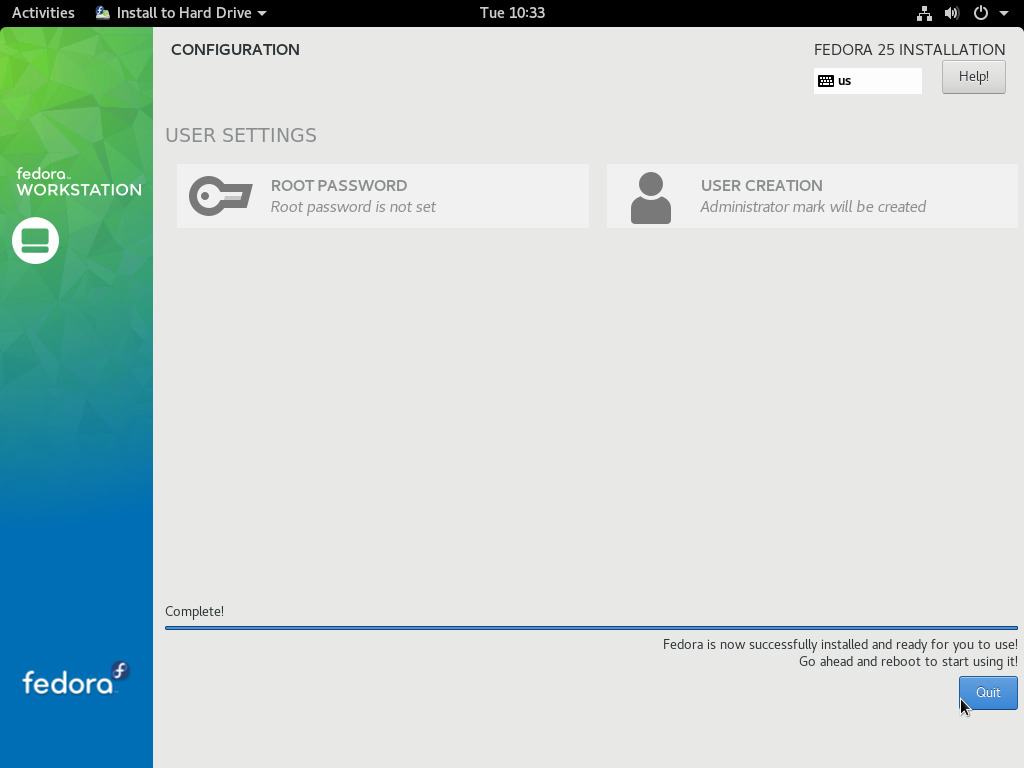
8) Done!
Finish! Now everything is configured and Fedora 25 has been correctly installed. Press quit to exit; unlike previous versions, the reboot won’t be automatic so you will have to reboot it manually depending on which Desktop Environment you’re using in the live media. (Usually GNOME: top-right corner; KDE: bottom-left corner.)
Conclusions
This release is full of features, and has quite some differences under the hood. The installation process is almost the same, with the exception you have to log in the live system. Starting with this version you can also use the new image-writer (Windows, MacOS, Linux) to create the media boot.
As always, if you spot issues or think there is anything I can improve in this tutorial, feel free to leave a comment down here : )
- 2020 A year in review for Marksei.com - 30 December 2020
- Red Hat pulls the kill switch on CentOS - 16 December 2020
- OpenZFS 2.0 released: unified ZFS for Linux and BSD - 9 December 2020


Recent Comments