NextCloud is a Dropbox-like solution for self-hosted file sharing and syncing. Installing NextCloud 14 on Ubuntu is trivial. Whether you want to backup, have file-syncing or just have a Google Calendar alternative, this guide is for you.
What is NextCloud? Is it like a “cloud”?
If you stumbled here by chance and don’t know what NextCloud is, here is an article explaining its principal features and advantages/disadvantages. In this other article you can find NextCloud 14 new features. To tell you the truth, NextCloud is a SaaS cloud, if you want to know more about cloud types you can read this article.
In this article we will cover the installation of the server (not the client).
Looking for an earlier version of this tutorial?
Step1: Install software
Important
I take absolutely NO responsibility of what you do with your machine; use this tutorial as a guide and remember you can possibly cause data loss if you touch things carelessly.
The first step in order to install NextCloud 14 is to install a web server and PHP. Although you can adapt this guide for many Ubuntu versions I suggest you to stick with Ubuntu 18.04 or higher since PHP7 is included. PHP7 brings many improvements over the past versions and will boost NextCloud too, as a matter of fact PHP7 is required since NextCloud 11. You will need root access during this procedure. The following procedure will install apache as webserver. Input the commands one by one to avoid errors!
Tip!
If you want to install PHP 7.1 or PHP 7.2, just replace each instance of the following command with 7.1 or 7.2.
Example: Let’s suppose you want to install PHP 7.2, the package php7.0-gd will become php7.2-gd
Ubuntu 16.04Ubuntu 17.04Ubuntu 17.10Ubuntu 18.04
Open a terminal and input the following commands:
# apt-get install apache2 libapache2-mod-php7.0 bzip2
# apt-get install php7.0-gd php7.0-json php7.0-mysql php7.0-curl php7.0-mbstring
# apt-get install php7.0-intl php7.0-mcrypt php-imagick php7.0-xml php7.0-zip
Open a terminal and input the following commands:
# apt-get install apache2 libapache2-mod-php7.0 bzip2
# apt-get install php7.0-gd php7.0-json php7.0-mysql php7.0-curl php7.0-mbstring
# apt-get install php7.0-intl php7.0-mcrypt php-imagick php7.0-xml php7.0-zip
Open a terminal and input the following commands:
# apt-get install apache2 libapache2-mod-php7.0 bzip2
# apt-get install php7.0-gd php7.0-json php7.0-mysql php7.0-curl php7.0-mbstring
# apt-get install php7.0-intl php7.0-mcrypt php-imagick php7.0-xml php7.0-zip
Open a terminal and input the following commands:
# apt-get install apache2 libapache2-mod-php7.0 bzip2
# apt-get install php7.0-gd php7.0-json php7.0-mysql php7.0-curl php7.0-mbstring
# apt-get install php7.0-intl php7.0-mcrypt php-imagick php7.0-xml php7.0-zip
Step2: Database selection
Now that you have set up the environment, all that is left is to choose a database that will support the installation. You have three choices:
- SQLite: is a single-file database. It is suggested only for small installations since it will slow NextCloud down sensibly.
- MariaDB/MySQL: are popular open source databases especially amongst web developers. It is the suggested choice.
- PostgreSQL: a popular enterprise-class database. More complicated than MySQL/MariaDB.
Now, this choice won’t really alter the functionality of NextCloud (except if you use SQLite), so pick whatever you know best. If you’re unsure pick MariaDB/MySQL.
SQLiteMySQL/MariaDBPostgreSQL
Install the software:
# apt-get install sqlite3 php-sqlite3
Install the software:
# apt-get install mariadb-server php-mysql
Or if you prefer MySQL:
# apt-get install mysql-server php-mysql
During the installation you will be prompted to choose a root password, pick a strong one. If you’re not prompted to choose a password, the default one will be blank. (This is potentially insecure, change it!)
Now you need to enter the database (you will be asked the password you just set):
$ mysql -u root -p
Now that you are in create a database:
CREATE DATABASE nextcloud;
Now you need to create the user that will be used to connect to the database:
CREATE USER 'nc_user'@'localhost' IDENTIFIED BY 'YOUR_PASSWORD_HERE';
The last step is to grant the privileges to the new user:
GRANT ALL PRIVILEGES ON nextcloud.* TO 'nc_user'@'localhost';
FLUSH PRIVILEGES;
When you’re done type Ctrl-D to exit.
Install the software:
# apt-get install postgresql php-pgsql
Now you need to enter the database:
$ sudo -u postgres psql
Now that you are in create a database:
CREATE DATABASE nextcloud;
Now you need to create the user that will be used to connect to the database:
CREATE USER nc_user WITH PASSWORD 'YOUR_PASSWORD_HERE';
The last step is to grant the privileges to the new user:
GRANT ALL PRIVILEGES ON DATABASE nextcloud to nc_user;
When you’re done type \q and press enter to exit.
Step 3: Install NextCloud
The last step is to actually get the software, configure it and run it.
Ubuntu
With these step we download the software and extract it:
# cd /var/www
# wget https://download.nextcloud.com/server/releases/latest-14.tar.bz2 -O nextcloud-14-latest.tar.bz2
# tar -xvjf nextcloud-14-latest.tar.bz2
# chown -R www-data:www-data nextcloud
# rm nextcloud-14-latest.tar.bz2
Now we need to create a new file in /etc/apache2/sites-available/nextcloud.conf . Feel free to use whatever editor you feel comfortable with and add the following lines:
Alias /nextcloud "/var/www/nextcloud/"

<Directory /var/www/nextcloud/>
  Options +FollowSymlinks
  AllowOverride All

 <IfModule mod_dav.c>
  Dav off
 </IfModule>

 SetEnv HOME /var/www/nextcloud
 SetEnv HTTP_HOME /var/www/nextcloud

</Directory>
Once done it’s time to enable the new site and enable apache mods that are needed by NextCloud:
# a2ensite nextcloud
# a2enmod rewrite headers env dir mime
# systemctl restart apache2
Step 4: Configuring firewall
This step is essential when your firewall is enabled. If your firewall is enabled you won’t be able to access your NextCloud 14 instance; on the other hand if it isn’t enabled you shouldn’t have any problems and you can simply skip this step.
Tip!
Keep in mind having a firewall enabled is a good security practice and you should already have one enabled.
In order for the firewall to work, it must be enabled. This guide will not include this part. When you enable a firewall many things can go wrong, e.g. you’re using SSH, you enable the firewall and your connection is cut and can’t connect otherwise, hence you should carefully review the documentation from your distribution.
To open the ports needed by NextCloud 14 follow these steps:
UFWIPtables
UFW is the default firewall in Ubuntu, if you’re using one, you’re probably using UFW.
# ufw allow http
# ufw allow https
IPtables is an older firewall (still widely used), if you’re not using UFW you can use IPtables directly.
# iptables -A INPUT -p tcp -m tcp --dport 80 -j ACCEPT
# iptables -A INPUT -p tcp -m tcp --dport 443 -j ACCEPT
Step 5: Install
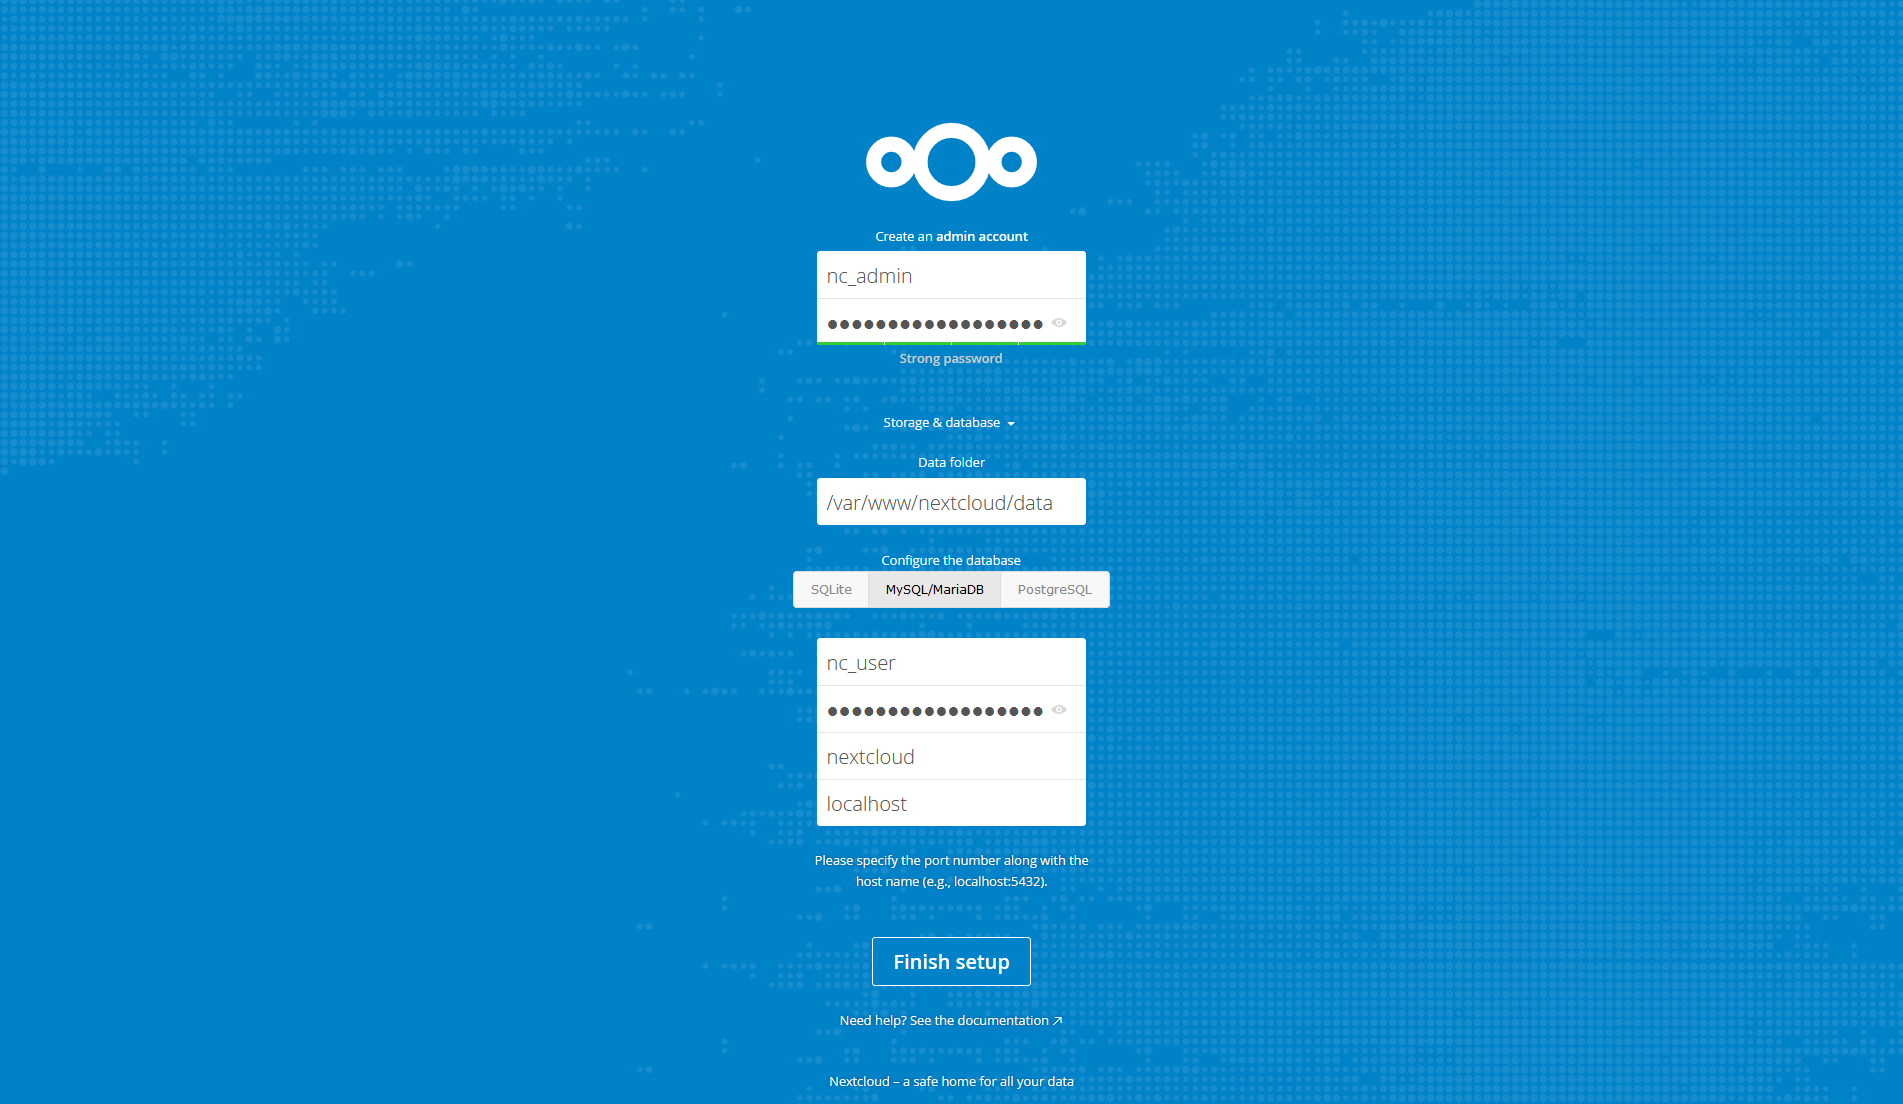
Once you’re done with selecting the database, it’s time to install everything. Head to http://YOUR_IP_ADDRESS/nextcloud/ and you will be facing the following screen:

NextCloud 14 Installation
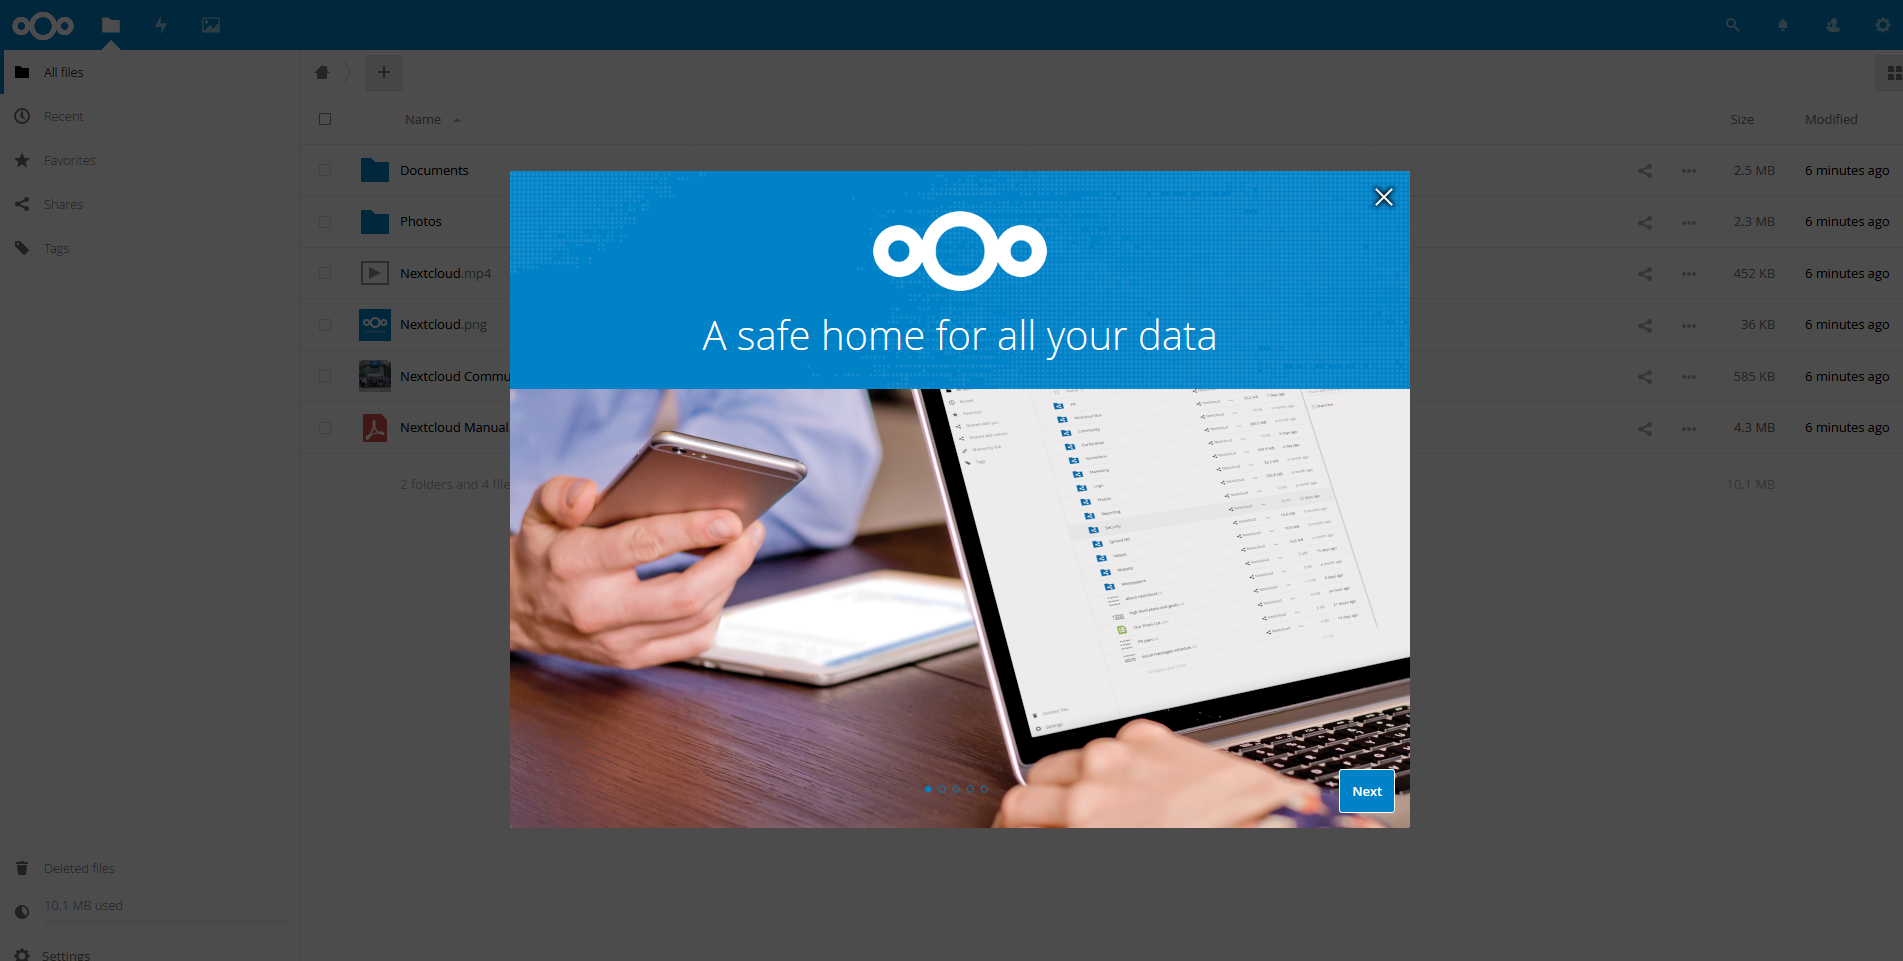
Select an administrator username and password, then you can select the data folder, but if you don’t know what you’re doing it’s best if you leave it with the default value. Then click on “Storage & Database” to select the database you chose during step 2. Fill everything and if you’ve followed all the steps correctly you should be seeing the following screen:
NextCloud 14 welcome screen
The IT guy with a slight look of boredom in his eyes. Freelancer. Current interests: Kubernetes, Tensorflow, shiny new things.


What about php7.2-mcrypt? Caches? Certificates?
This onepager is nice, but incomplete.
Hello Ciuthran, incompleteness is subjective.
PHP 7.2 deprecates mcrypt in favor of Sodium, which is bundled with PHP itself. According to this issue “it should just work” without mcrypt so you shouldn’t worry.About caching, I’m evaluating whether to include this part in my tutorials. Unfortunately there are many factors that influence this step (e.g Redis) which are not exactly beginner-friendly and may introduce unneeded complexity in the tutorial.Certificates are a complex matter taken alone, including this step here would be nice but difficult. Most people will encounter difficulties setting up a domain name, which is explicitly avoided in this tutorial for this exact reason, let alone setting up a certificate or even using Let’s Encrypt!.
That said there may be room for such topics in the future, once I find the easiest way to get them working without compromising the readability and simplicity of this tutorial.
i followed your step but unable to access page with http://ipaddress/nextcloud
when i checked apache2 logs its giving error
Apache2: Could not reliably determine the server’s fully qualified domain name, using 127.0.1.1
any ideas
Hello Tabrez, that log message is completely normal since in my tutorial you didn’t configure a FQDN. Are you sure it says “127.0.1.1” instead of “127.0.0.1”? Also, have you verified you have executed all the steps correctly? Also, if you go to http://ipaddress (without /nextcloud) do you get a page or the server won’t respond?
DEAR MARK,
after adding entry in etc/hosts i resolved the above issues, however i am not able to reach nextcloud console by ipaddres or hostname with or without /nextcloud
trying to find the solution over internet for last couple of hours. but unable to achive anything do we need to add any IP address in nextcloud.conf file
sorry for trouble i am new to linux
Hello Tabrez, don’t worry about being new to Linux. The issue you are describing, almost certainly, isn’t related to NextCloud. The problem is that you probably don’t have connectivity to the machine or that there’s something hindering communication from/to the webserver. Can you please confirm you can ping the server machine from your client maxhine?
There’s no need to fiddle with IP addresses or domain names since Apache will bind to port 80 by default.
About the config.php it is a file that is created during the last step (step 5). Since you probably didn’t complete this step it is perfectly normal for the config.php to be absent. Also you should remove your config.php file copied from config_sample.php since it will only contain dummy data. Once you resolve the problem you will be able to create your config.php file through the browser (step 5).
ok probably i will check firewall. i have enable steps mentioned in step 4. and all ports are allowed currently, not sure where it is blocking
i am able to ping the server which is on cloud. i am also able to take ssh. but when i telnet on port 80 its blocked
also just for your more information. after following all your steps. when i check config.php file in “/var/www/nextcloud/config” folder, i was unable to find this file. there was only 1 file config_sample.php. i renamed it as config.php and added ip address and domain in trusted domain list. not sure whether this was required