How to manage Ubuntu Firewall (like a boss)

A firewall is a security system used to control network traffic going in and out of computers. Today we might take it for granted, however the firewall still remains one of the most important security devices in our systems. Historically, the Linux firewall par excellence has always been IPtables, however its rules are quite difficult to master. Thankfully all Ubuntu starting with 8.04 LTS include an easier to use, uncomplicated firewall: UFW.
Getting to know UFW
UFW is the default firewall for Ubuntu starting with version 8.04 LTS. UFW stands for Uncomplicated FireWall, as the name suggests it is simple to configure. Commands are intuitive and you even have a GUI, everything can be managed without a deep knowledge of networking (in contrast with firewallD which requires quite a bit of knowledge).
Under the hood UFW interfaces with IPtables which does all the lifting. This means you don’t have to choose between them! Many people care about security but can’t write IPtables rules (they are pretty difficult). On the other hand, UFW simplifies IPtables management, but you won’t be able to harness the full potential of the underlying firewall without writing IPtables rules.
Starting UFW
In order for the firewall to work, you need to start UFW. You can do this using a simple command, however be careful: if you’re using a remote connection (e.g. SSH) you may lose your connection!
$ sudo ufw enable
Firewall is active and enabled on system startup
This command will start UFW and will also ensure it is started on system startup.
Stopping UFW
If you want to stop UFW:
$ sudo ufw disable
Firewall stopped and disabled on system startup
Checking UFW status
If you want to check whether UFW is enabled/disabled you can do so using:
$ sudo ufw status
Status: active

To                         Action      From
--                         ------      ----
22                         ALLOW       Anywhere
22 (v6)                    ALLOW       Anywhere (v6)
Notice that the command will also display a list of rules for the configured ports.
Managing ports
Managing ports using UFW is quite straightforward, there is no need to know IPtables syntax and you can add/remove ports using one command. The changes are immediate, check twice before submitting a command!
Hint: In place of PORT you may also use a friendly name if the service is common (e.g. ssh becomes port 22).
Opening port (allowing)
To open a port do:
$ sudo ufw allow PORT
If not specified, the firewall will assume you want to open/close a tcp port. If you want you can specify the protocol:
$ sudo ufw allow 53/udp
Closing port (denying)
To close a port do:
$ sudo ufw deny PORT
Removing a rule
In the case you want to delete an existing rule, for example allow http traffic, you can simply do:
$ sudo ufw delete allow 80
Simply rewrite the rule you want to delete without ufw, and prefix ufw delete to that rule.
Advanced rules
Sometimes you may need further security (e.g. allowing only one IP address), that’s accomplished using advanced rules. In the following examples I will only show allow rules, but they are also valid if you want to deny addresses.
Allowing connections from a specific address (or subnet)
You may want to allow connections from a specific address:
$ sudo allow from 192.168.0.4
You may also specify a subnet using CIDR notation:
$ sudo allow from 192.168.0.0/24
Allowing connections to address/port combination
If you only want to open one port for one address only:
$ sudo ufw allow from 192.168.0.4 to any port 22 proto tcp
This command will allow traffic coming from 192.168.0.3 to port 22/tcp. The tricky part is the “to any port” which roughly translates to “coming from any port to port 22“.
Turning on firewall logging
Maintaining a firewall log is a good practice and it can be helpful to detect break in attempts. Logging taken alone is already a complex matter, UFW can log traffic using a simple command:
$ sudo ufw logging on
You can also define a priority in place of on, priorities are: low, medium, high. Each priority changes the behavior of the logging module, if you just use the previous command the default logging setting is low.
You will find the log in the /var/log/ufw.log file.
Using the Graphical User Intercace
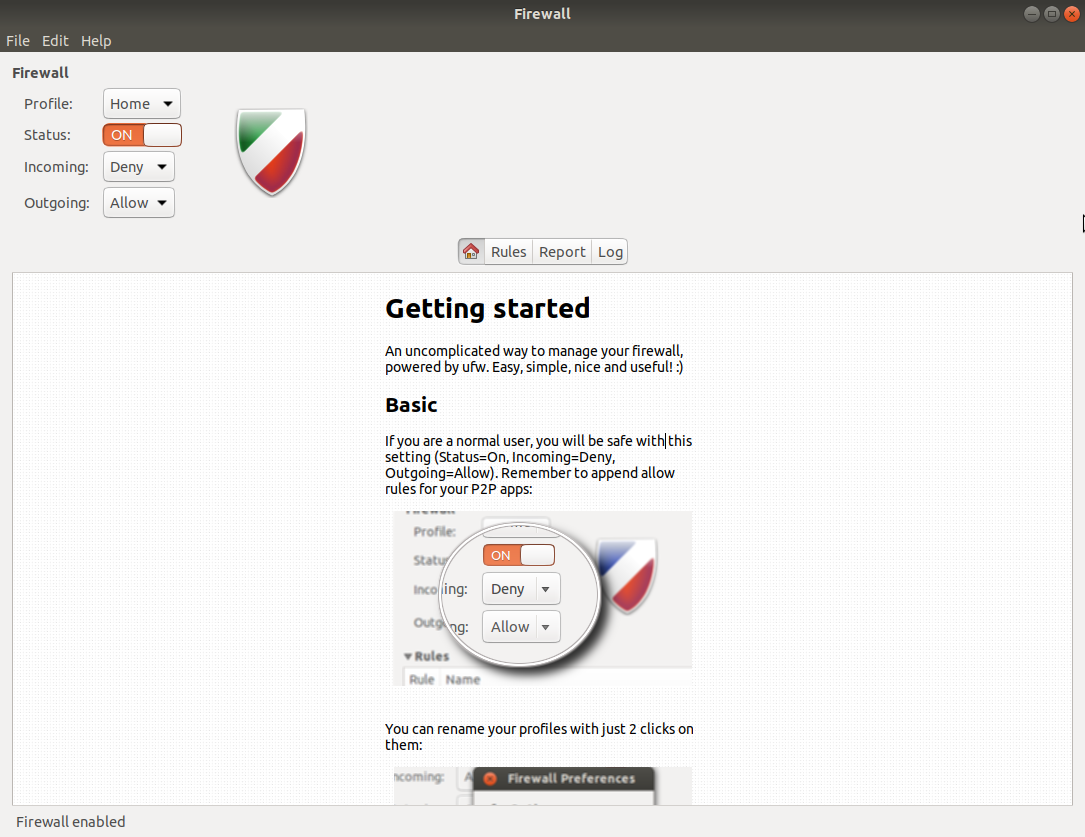
Ubuntu firewall FUI: Gufw
UFW also has a GUI called gufw. Since UFW is already “uncomplicated” I suggest you to use the CLI instead, but if you insist in having a nice-to-use GUI, this section will guide you through the installation of gufw.
Installing gufw
The gufw package is available in almost every Ubuntu version (starting with 8.04 LTS) in the Universe repository. In order to install gufw you must enable the Universe repository.
To install gufw, simply enter these three commands:
$ sudo apt-add-repository universe
$ sudo apt-get update
$ sudo apt-get install gufw
Done, you will find gufw installed in your system (under the name Firewall Configuration). There is not much to add since the program is pretty self-explanatory and there is even a short tutorial welcoming you.
- 2020 A year in review for Marksei.com - 30 December 2020
- Red Hat pulls the kill switch on CentOS - 16 December 2020
- OpenZFS 2.0 released: unified ZFS for Linux and BSD - 9 December 2020


Recent Comments