How to create a bootable USB on any operating system with Etcher.io
Almost every operating system installation starts with one step: creating a bootable medium. This medium, usually a USB drive is then used to boot the operating system installer and install the operating system. Today we’re going to take a look at Etcher.io a free, open source and cross-platform software to create bootable drives.
Important
I take absolutely NO responsibility of what you do with your machine; use this tutorial as a guide and remember you can possibly cause data loss if you touch things carelessly.
Installation
Etcher Usage
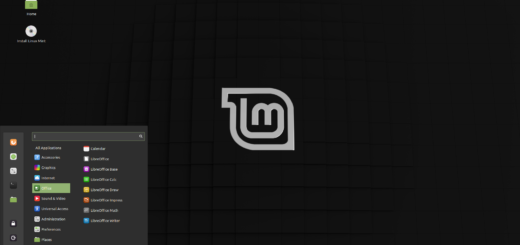
The usage is quite straightforward (as shown in the image):
- Select an image: to burn onto the drive. There are many supported formats including iso, img, zip and gzip.
- Select a drive: that you wish to use as a bootable medium. Remember this drive will be completely erased.
- Flash!: press this button to start flashing the drive, once the process is complete you can eject the drive and use it.
That’s all there is to it! No further steps, as easy as shown in the figure. You can also replicate the same workflow on every operating system since etcher is cross-platform.
Image courtesy of resin.io
The IT guy with a slight look of boredom in his eyes. Freelancer. Current interests: Kubernetes, Tensorflow, shiny new things.
Latest posts by mark (see all)
- 2020 A year in review for Marksei.com - 30 December 2020
- Red Hat pulls the kill switch on CentOS - 16 December 2020
- OpenZFS 2.0 released: unified ZFS for Linux and BSD - 9 December 2020


Recent Comments